Ok, so you’ve got your AWS account, it’s new, shiny, and loved by you.
But it needs to be secure, or you may lose it.
So I’m going to walk you through the basics you should do with your new AWS account to make it secure.
Go ahead and login to the AWS console.
Pull up the list of the 87 services offered by Amazon. You’ll want to look for the Security, Identity & Compliance heading and click on IAM.
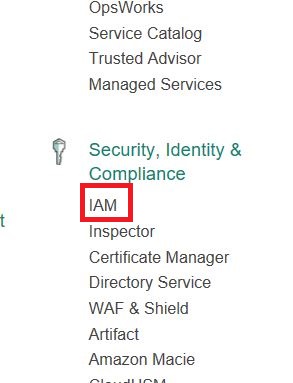
You’ll arrive at a page that looks like this:
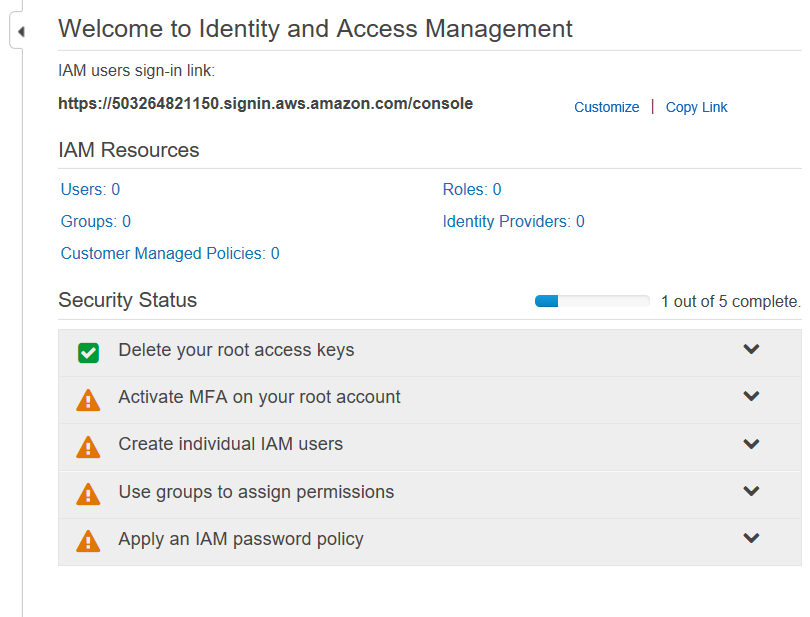
This is Amazon’s helpful walkthrough wizard to make sure you take care of the critical steps to secure your account. As each is completed, you’ll see a green checkbox show up next to it. The caution orange exclamation mark means there’s still work to do on that section.
You can click on the dropdown for more information about each of these steps. Chick on the one already marked green, “Delete your root access keys”.

Amazon gives you a brief explanation about why this step is important and what to do.
MFA Setup
Ok, let’s get started setting up multi-factor authentication for your account.
What is multi-factor-authentication? It’s a way of confirming that not only do you have the information to access the account (the email or username and password) but you also can confirm that you are actually yourself and not someone else.
How is this done? After you type in the login and password, you’ll be prompted to enter a numeric code that changes every few seconds. How do you know what code to use? You use an MFA device that gives you the right code. The device also rotates the code every few seconds, in sync with the requirements for the website. You can either use an actual hardware device for this code or you can use a Virtual MFA that you install on your cell phone. We’ll walk through these steps.
Go ahead and click on “Activate MFA on your root account”. You should see the following:
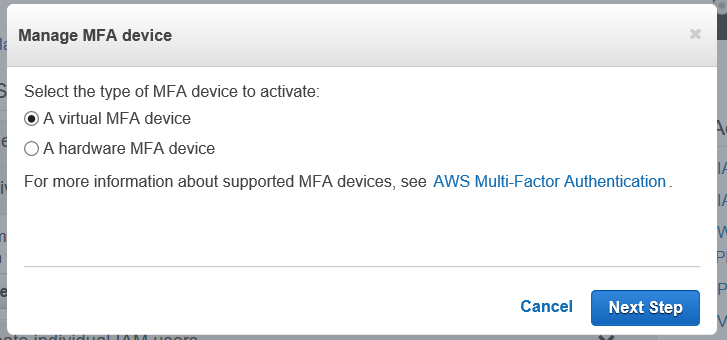
If your curious about the devices you can use, click on the link “AWS Multi-Factor Authentication”.
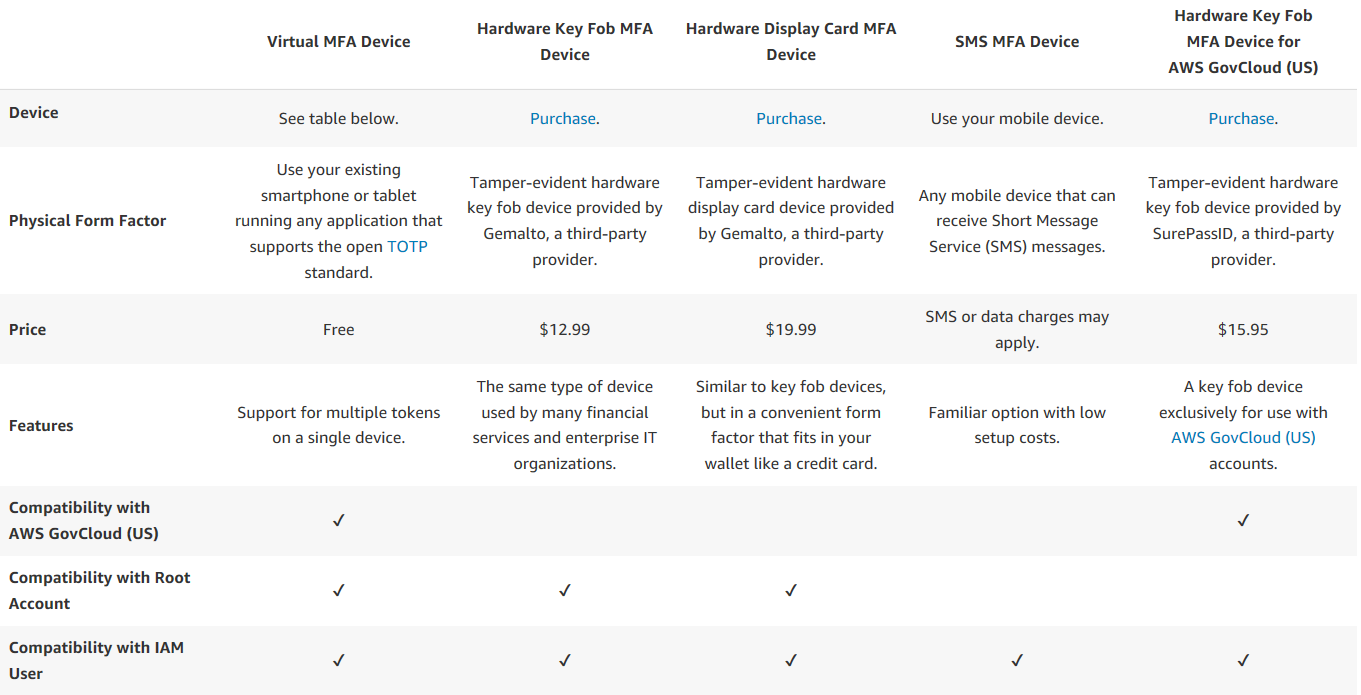
You’ll see a detailed description about MFA, along with the various MFA devices that AWS supports.
They are:
- Virtual MFA Device
- Hardware Key Fob MFA Device
- Hardware Display Card MFA Device
- SMS MFA Device
- Hardware Key Fob MFA Device for AWS GovCloud (US)
We will come back to the Virtual MFA Device, as that’s the one I’ll be using, but let’s explore the other choices.
Clicking on the Purchase link for Hardware Key Fob MFA Device takes you to the product page page for the device on Amazon.

Bummer, the stock is currently unavailable, and it doesn’t show any estimate of a restock. Based on the comments for this device being several years old, it looks like AWS is abandoning this device for MFA Security. I wouldn’t be surprised if this method goes away soon.
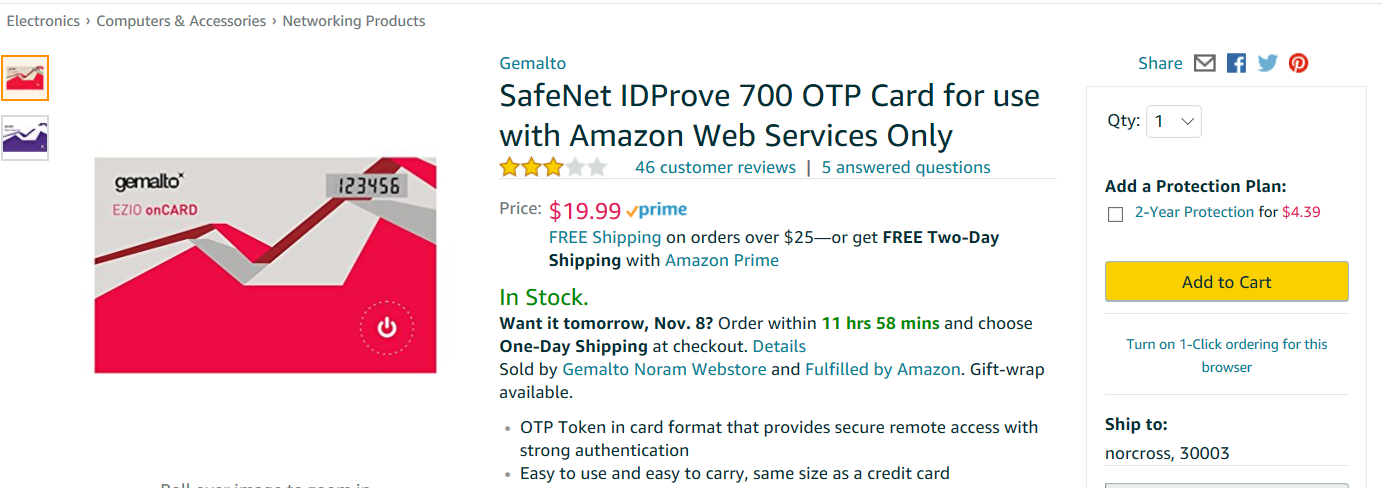
So, let’s look at the next item in our bullet list: the Hardware Display Card MFA Device
Aha, this one is in stock. I would guess this is what AWS would prefer people to use if they use a hardware MFA solution. But with the convenience of Virtual MFA devices, I didn’t feel a need to purchase this, and instead spent the $19.99 on pizza. Of course zombies love pizza, but that’s information for another post.
So the next option in our list is the SMS MFA Device. We may look at that in more depth, but take note that you cannot use it for the root account, only for an IAM user account.
What’s the difference between the root account and an IAM account? We’ll see this shortly, when we set up an IAM user, but the root account logs in using an email address, whereas the IAM user logs in with their IAM user name. You’ll see this in a moment.
The last option is only intended for government work, specifically the US government, which is hard at work even as we speak cooking up a zombie virus to infect all of mankind. What good chums. Click on the Purchase link to see what their device looks like:
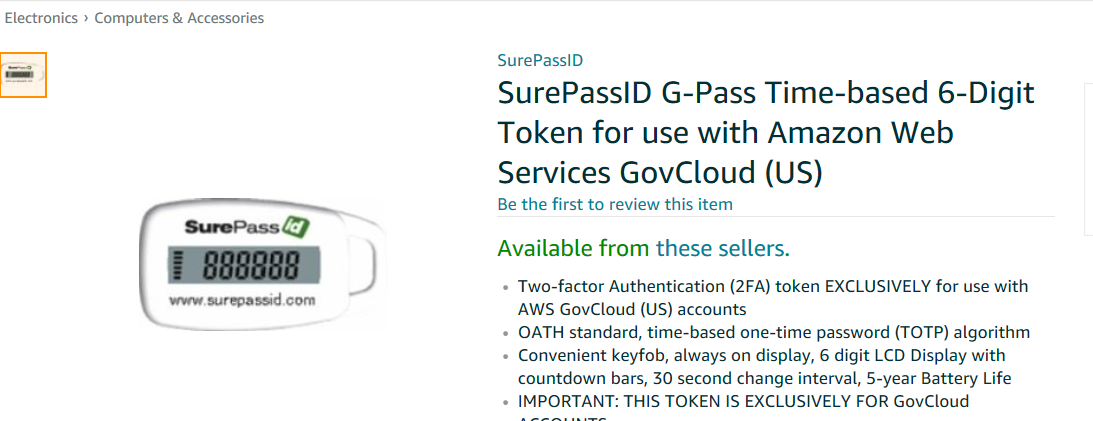
Also note, this won’t work for the root account.
So for this cost-driven, pizza-munching zombie, I’m going to go with the Virtual MFA Device.
You can see what VMFAs are supported if you scroll down a little.
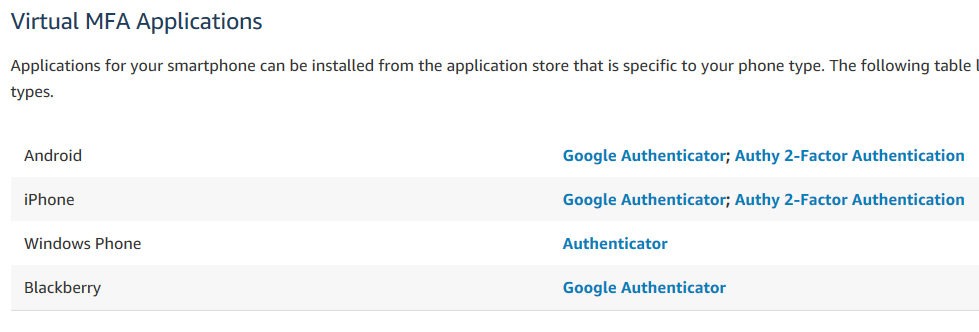
Oh cool, they have Google Authenticator, which I already use for my Gmail account. I’ll use that! Oh, and it’s nice to see Blackberry is supported, I have a zombie friend who still swears by Blackberry devices.
Anyway, close the tab with all the devices listed and go back to your IAM screen. Click on the “Next Step” button under “Manage MFA Device”.
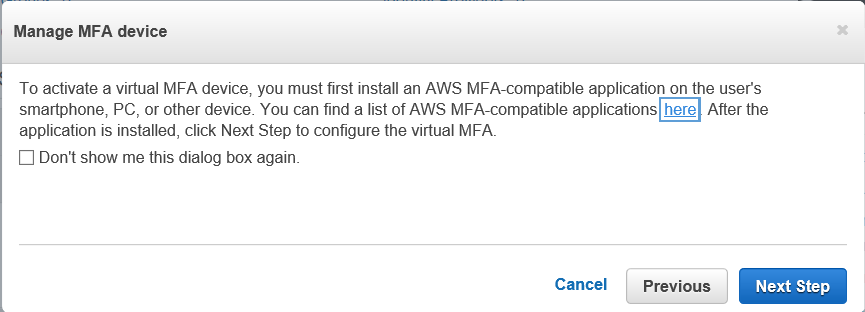
Cool, information about MFA devices, which we already looked at. Go ahead and click “Next Step” again.
You’ll now see a QR code. For security purposes, I cut out part of my code in the screen shot.
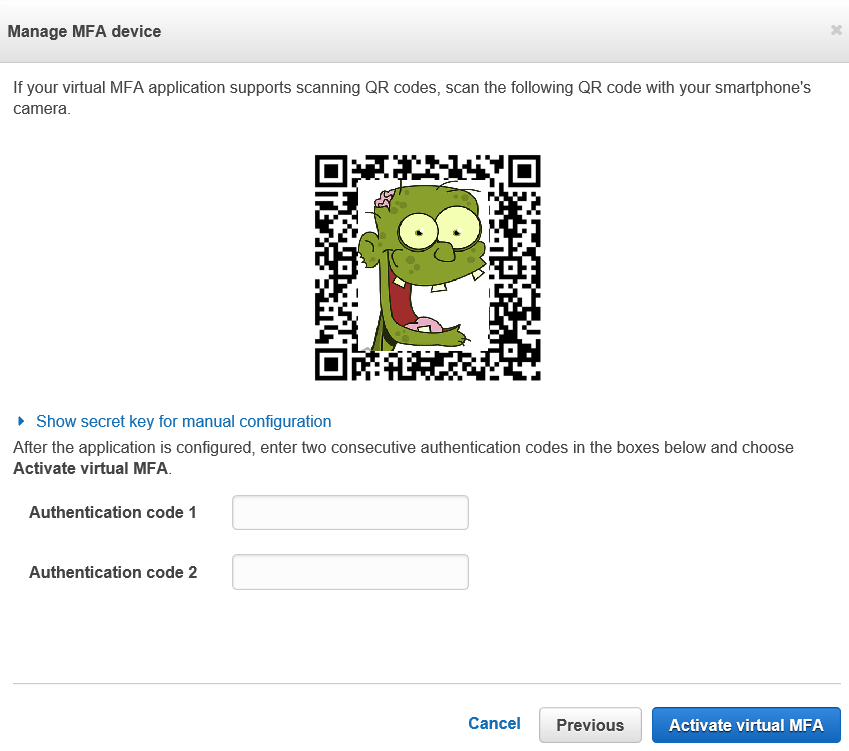
Go ahead and open Google Authenticator and click the “+” button to add a new code, then select “Scan barcode”. Aim your device at the QR code and it should automatically add the MFA entry. Also, if you already have another AWS authenticator for whatever reason, you can add a second one, no problem.
Now you will need to enter two consecutive numeric codes that show up for the particular authenticator entry in your phone. Don’t go check Facebook or Twitter right now, because you need one code, followed by the very next code. Enter code 1 for “Authenticator code 1”, then the next code in “Authenticator code 2”.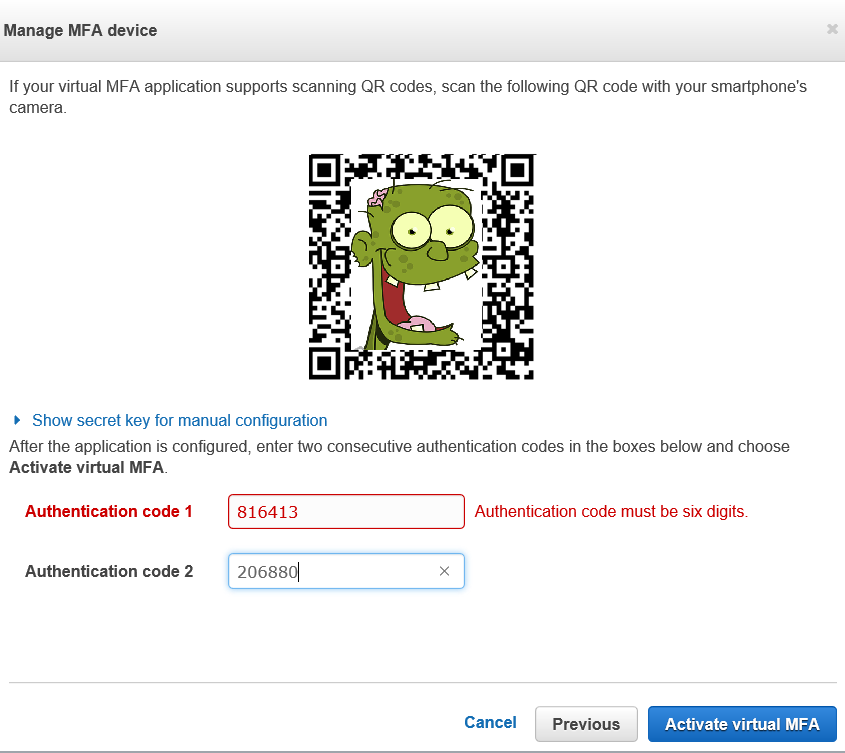
Great error message, huh?
Anyway, now you’ll see that your MFA device is set up. Click “Finish”.
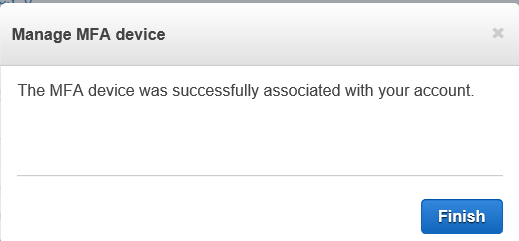
One note, after clicking finish, I went back to the IAM screen and it didn’t know my MFA had been set up already.

Just hit refresh (F5) and you should be fine.
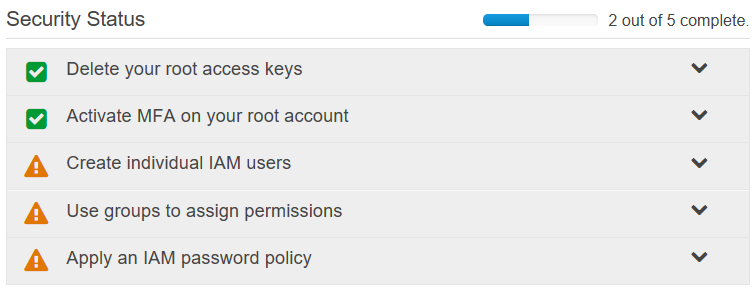
Create individual IAM users
The next step is to create an individual user account for AWS access. Click on the dropdown and you’ll see why.
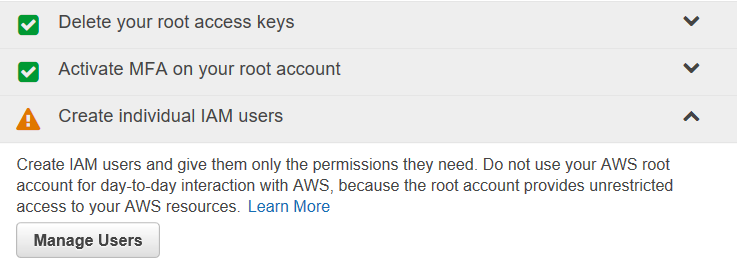
Ideally, you don’t want to give the keys to the kingdom to everyone, so you will create individual accounts for users based on how they will interact with AWS.
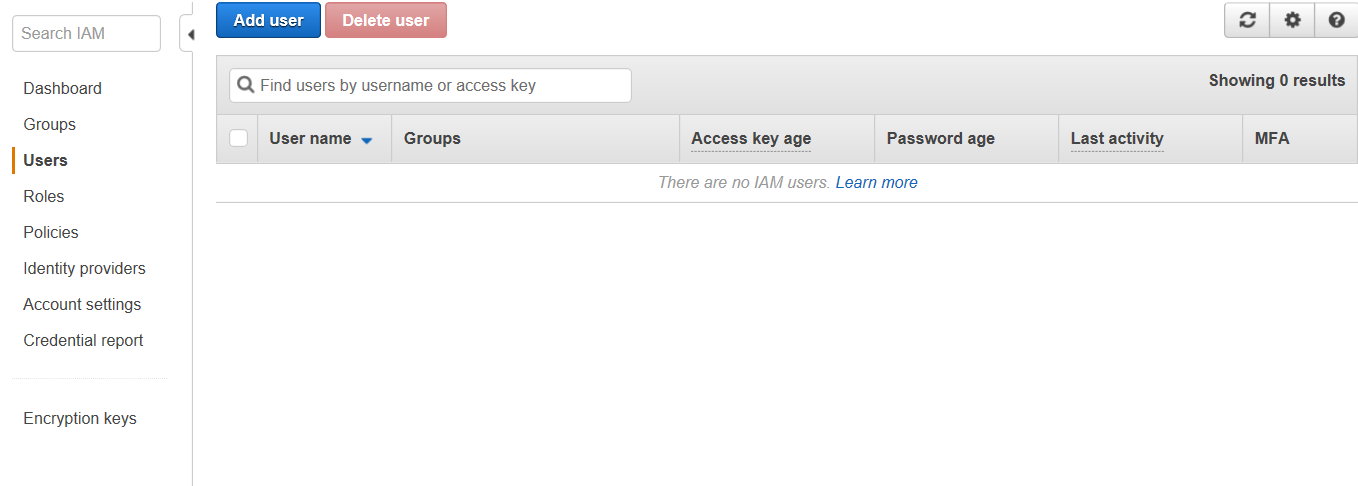
So let’s click on “Manage Users” to get started
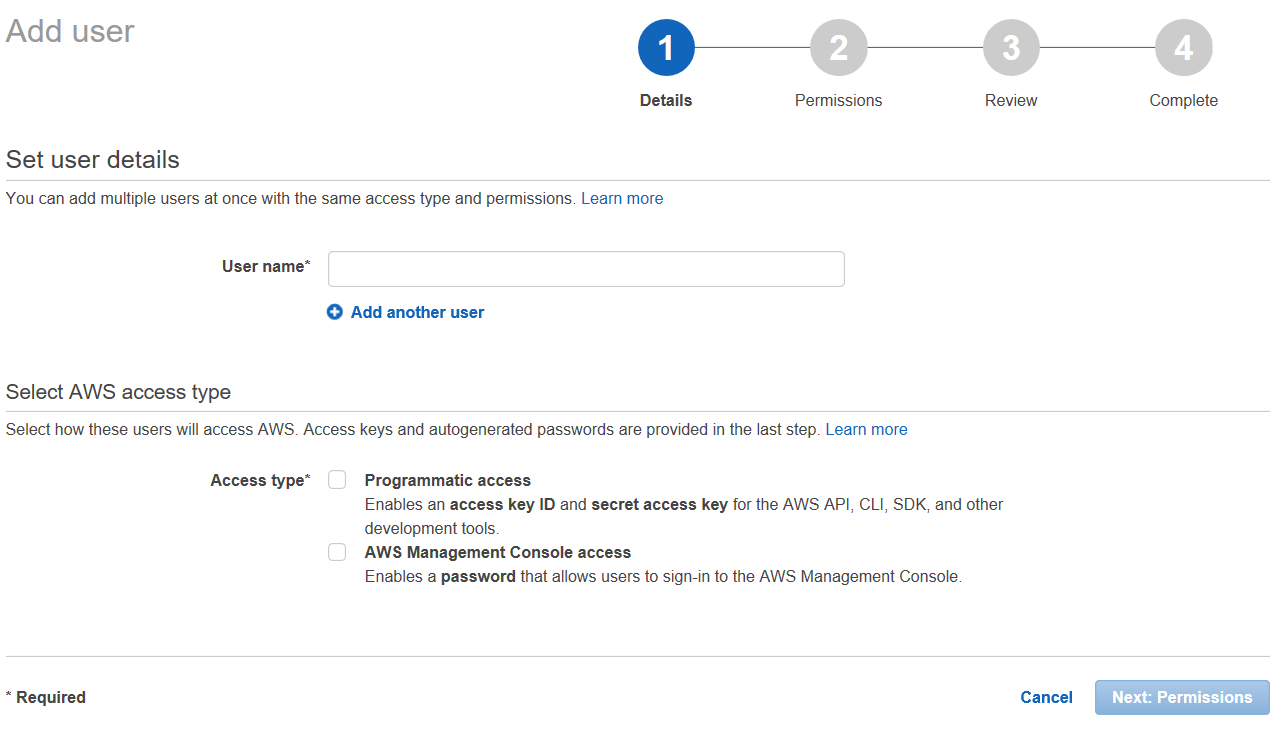
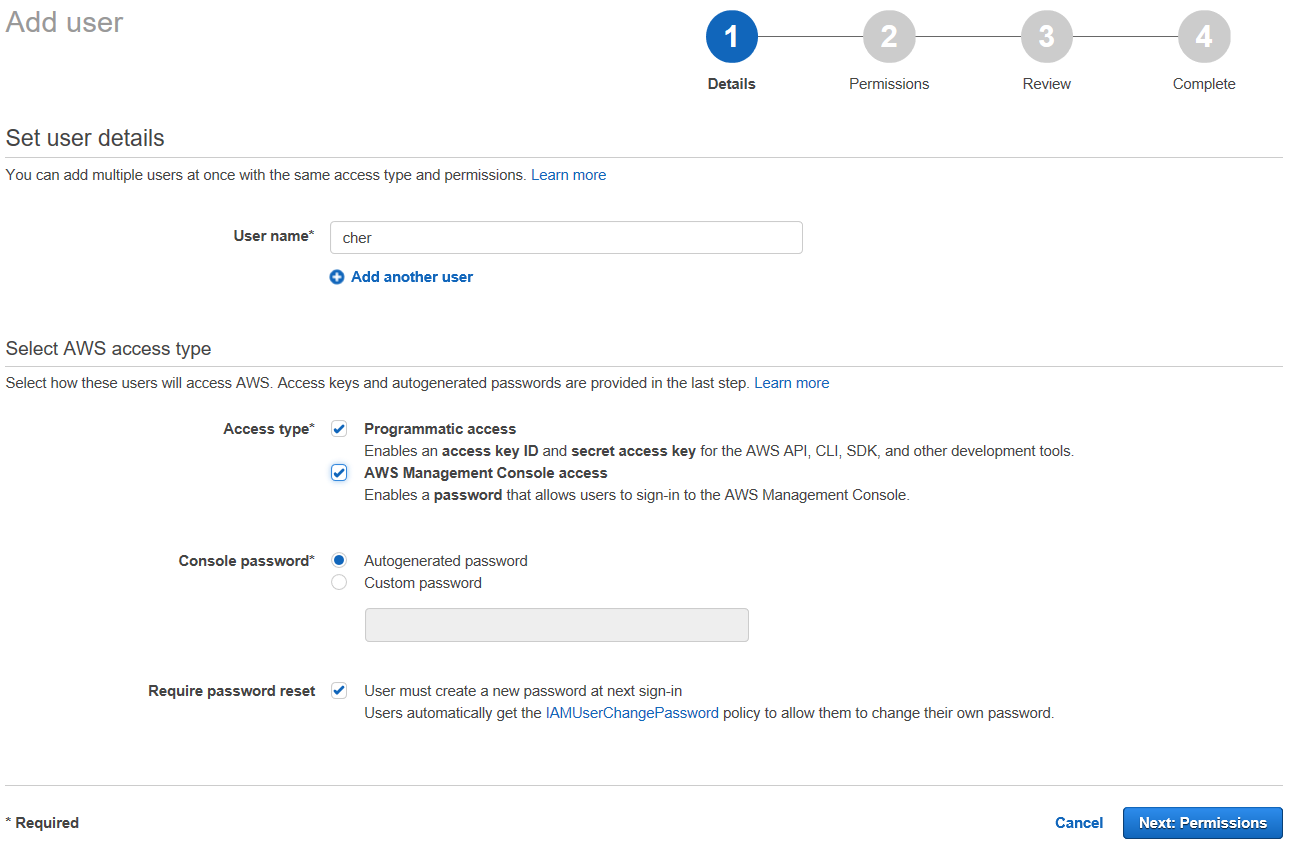
Go ahead and click on “Add user” the blue button at the top of the page.
Hmm, what zombie shall I add? I know, we will add Cher!
Cher is clearly a zombie, as she hasn’t aged in the last 50 years. Her voice is a gift to all zombiehood and we should be proud to call her one of our own.
Brief Cher intermission: check out this video on Youtube. I’ll wait. Feel free to dance to the music.
Back now? Good. So, let’s add Cher as a zombie to our site.

After we select the user name, we need to decide what level of permissions we want to give Cher. Because she is Cher, we will give her everything.
We will give her Programmatic access as well as AWS Management Console access.
What’s the difference?
Both will generate a Access key ID, which is used to identify the IAM user. Programmatic access means we will also generate a Secret access key that Cher can use for her programming needs. AWS Management Console access means she will get a password that she can use to login to the AWS Console just as we’ve been doing so far.
These are two different values and are not interchangeable. You can’t use the secret access key for a password, and you can’t use the password for programming access. We’ll explore this later when we get to actually using AWS in a program.
Go ahead and click the blue button “Next: Permissions”.
Setting up a Group
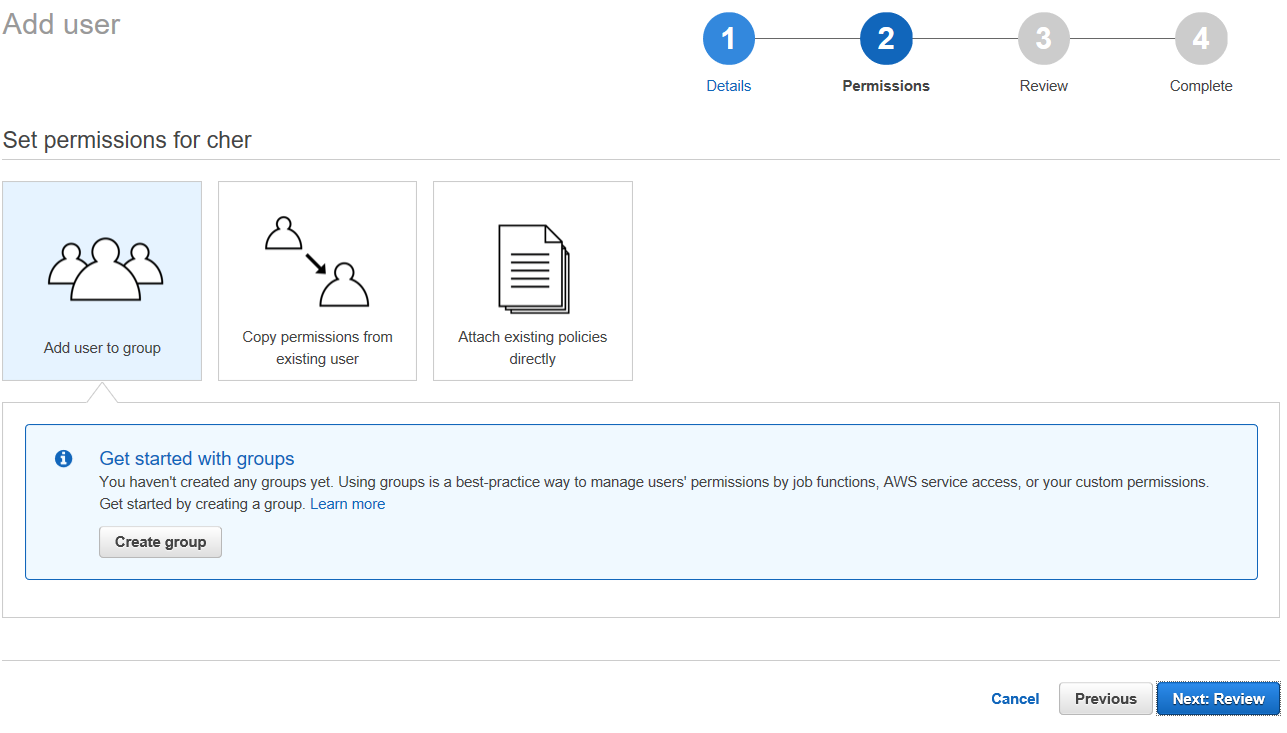
So Cher can’t just be Cher with no group affiliation. She needs to belong to a group. Those of you from a Unix/Linux background are probably familiar with this concept, but for those who are new to it, a user needs to be added to a group. They can be added to multiple groups. Groups are how we define access. We don’t do that at a user level, only at a group level.
So you should now see that AWS wants you to set up a group.
Go ahead and click on “Create group”
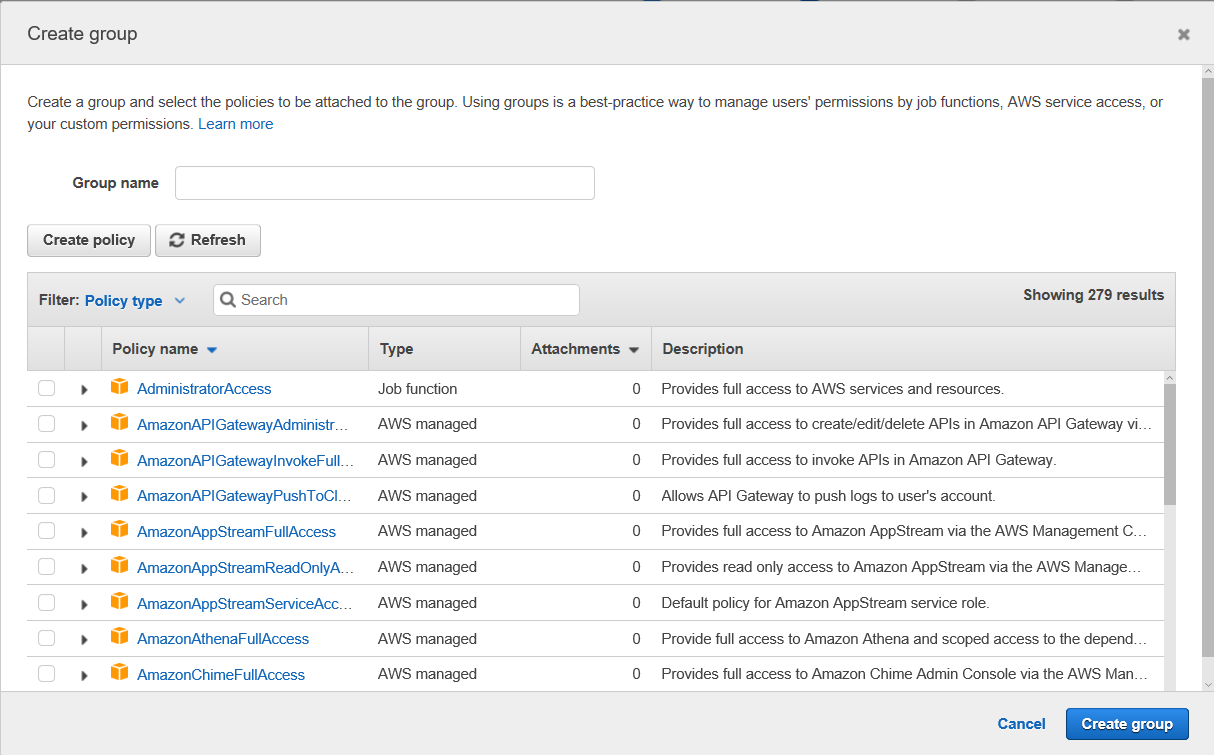
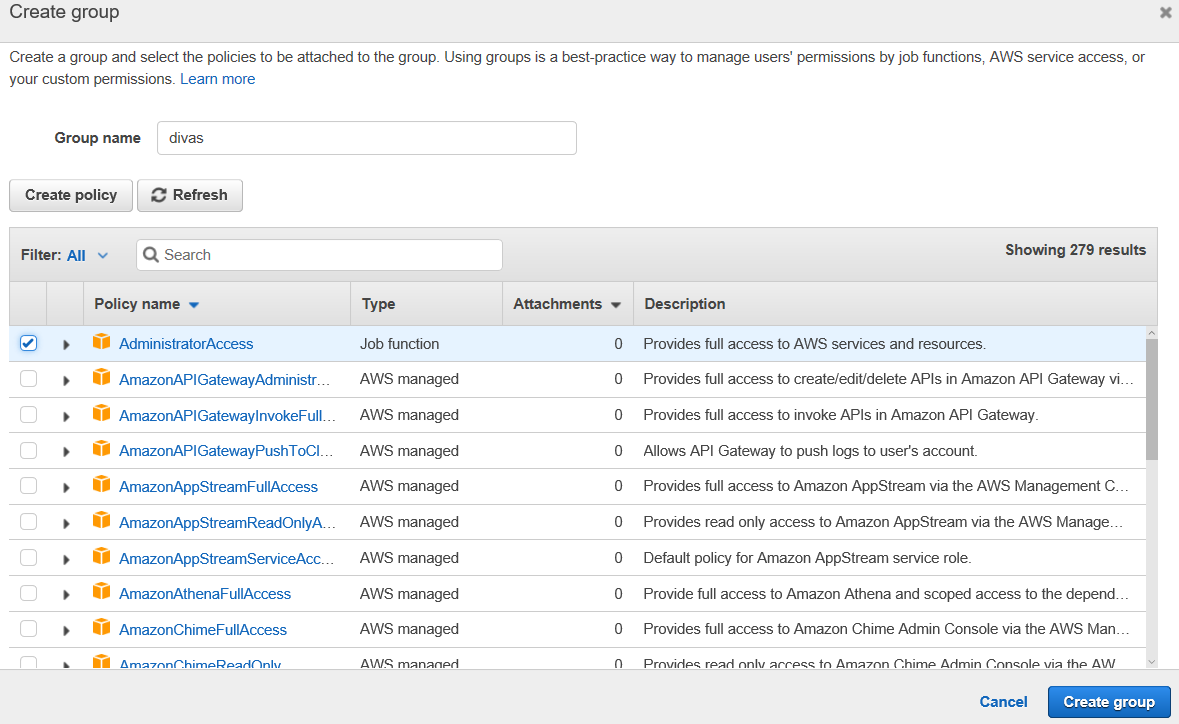
First part of this is creating a group name, then we have to choose policies to associate with the new group. For Cher, I will create a group named “divas”.
Then you will see a list of 108 various service policies. If you click on the AdministratorAccess policy, it will describe what the policy can do. So AdministratorAccess looks like a pretty wide open policy. But if you’d like to see the specifics, you can take a look at the JSON that defines the policy by clicking on the “{ } JSON” button
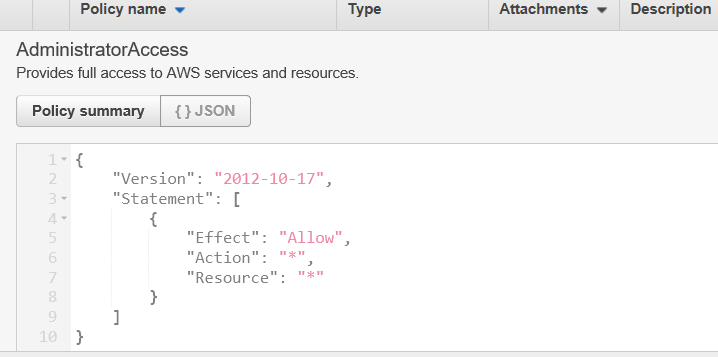
What this JSON is describing is that all Actions (denoted by the wildcard “*”) are allowed to access (Effect: “Allow”) all Resources (denoted again by the wildcard “*”).
If you find it too intimidating to look at 108 service policies, you can group them instead by Job Function by clicking on the filter for Policy Type:
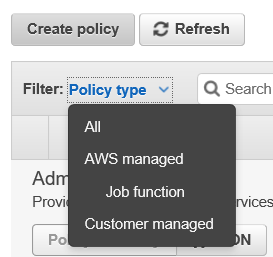
This changes our display significantly:
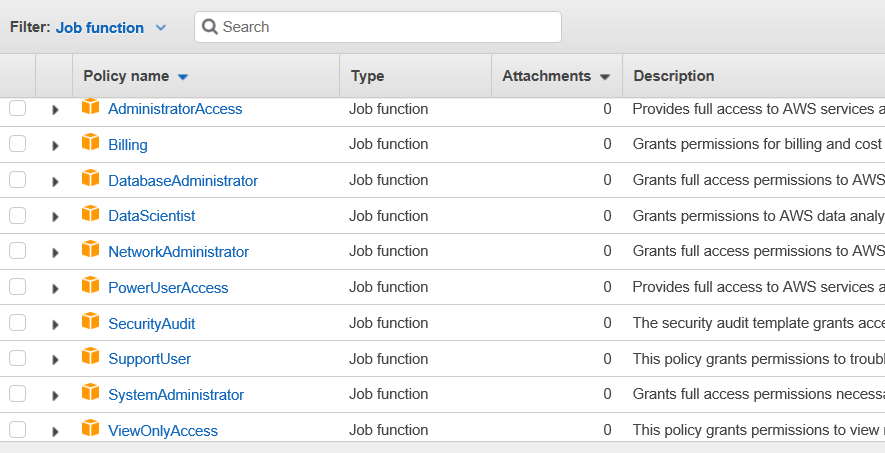
This might provide a more reasonable way to view the services you want for a given group.
In any case, since this is Cher, and she may want to completely run my site one day, I am going to assign her AdministratorAccess permissions by clicking on the checkbox for that policy.
So with that checked, go ahead and click the blue “Create group” button.
Also note, should Celine Dion want an account, she won’t be added to the divas group. Not all divas are equal.
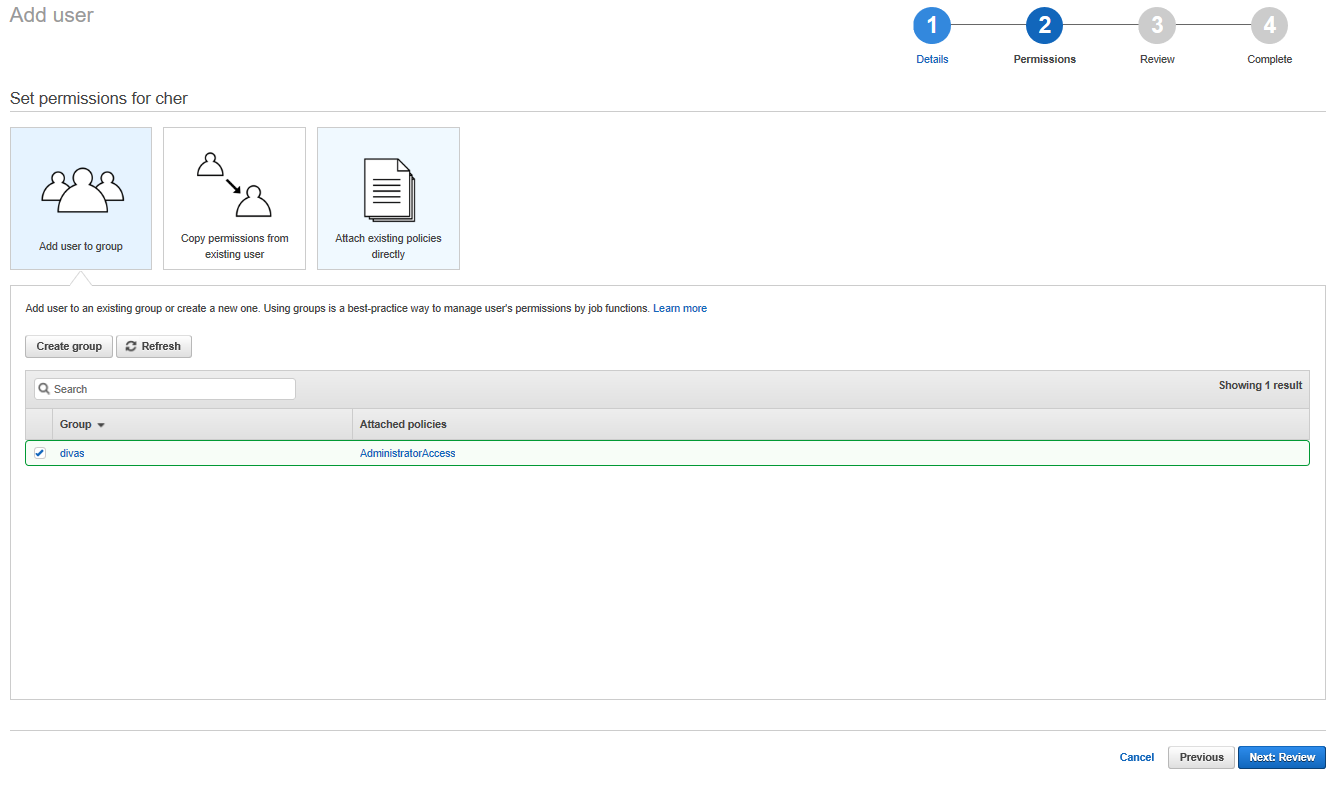
So with that, we have a nice newly created group called “divas”:
So we can see that the permissions for Cher have been set to follow the “divas” group policy. That looks good, so go ahead and click the blue button “Next: Review”.
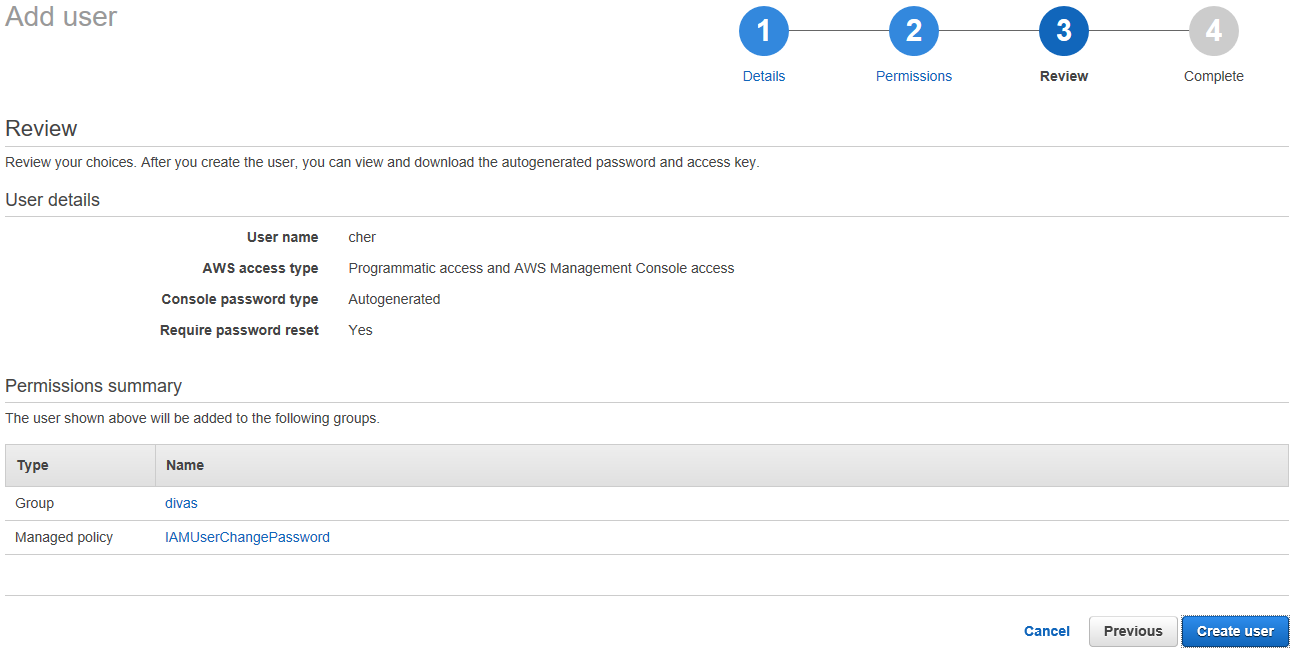
Here we can see a summary of the create new user screen for Cher. Go ahead and click the blue button “Create user”.
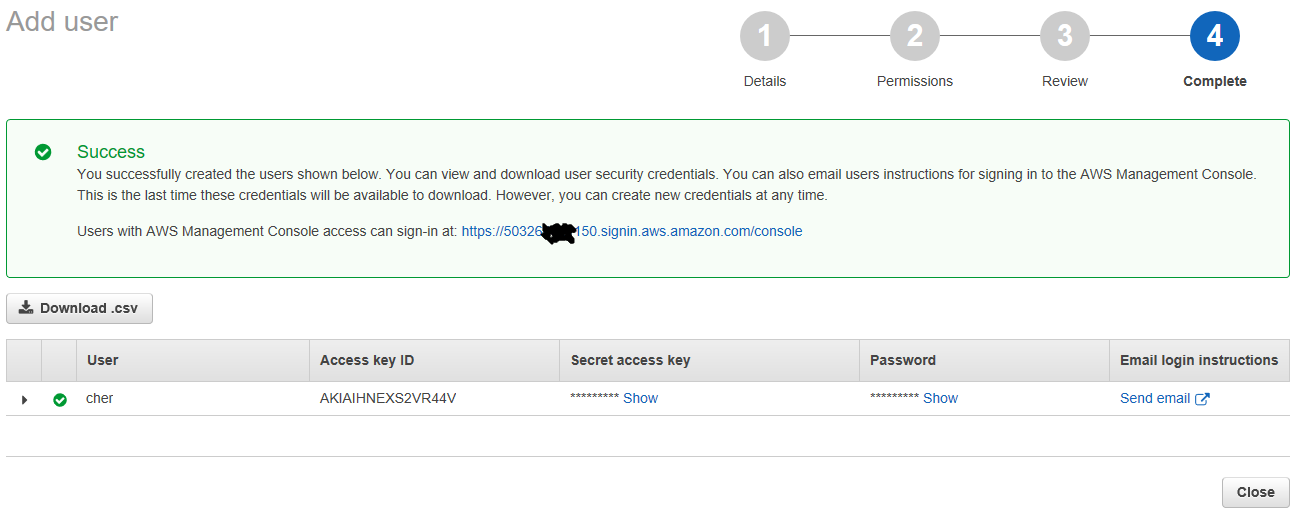
We should take note of a few things on this screen.
First, there is a blue link at the top that we can send to Cher for her to use for logging in. I smudged it for security reasons. Next in the grid we can see the Access key ID, the “Secret access key”, and the “Password”. You can click on the “Show” link button to reveal those secret bits of information. Also at the end, you can click the “Send email” link to send an email to someone if you wish.
You can expand the tree under the user to see a summary of what you did in creating the user.
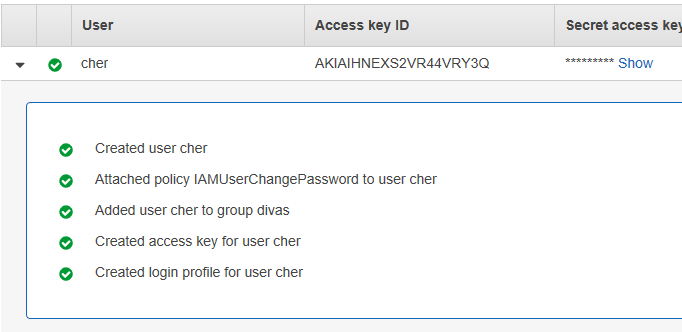
Also note, if the user loses their Secret access key or password, you can make a new access key, but you can’t reset the password or security access key. So make sure to store this information. If you look right above the user grid, you’ll see the option to “Download .csv”. You may want to do that so you have the information in a file for reference.
Go ahead and click the grey “Close” button at this point and you’ll return to the User screen:
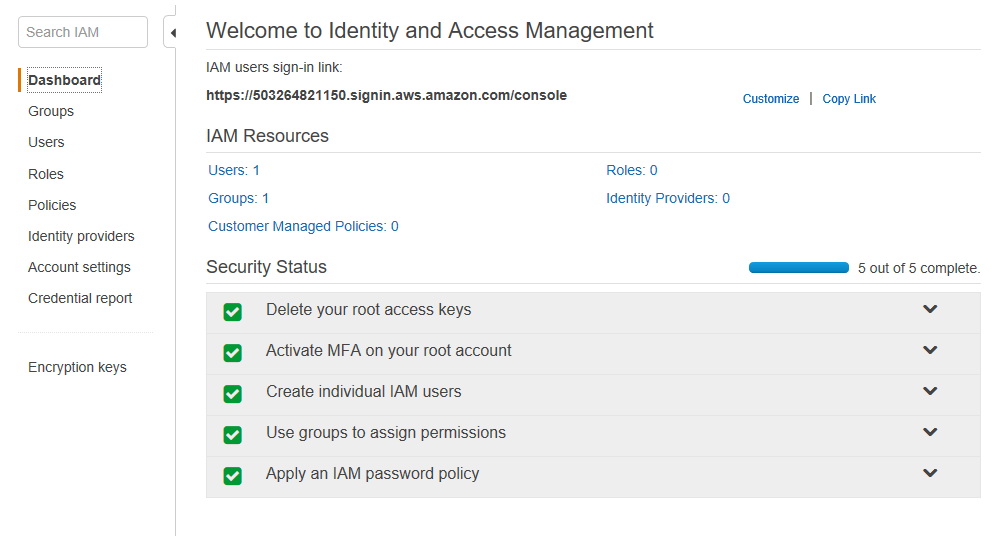
Now to get back to the main IAM screen, click on the “Dashboard” link on the left.
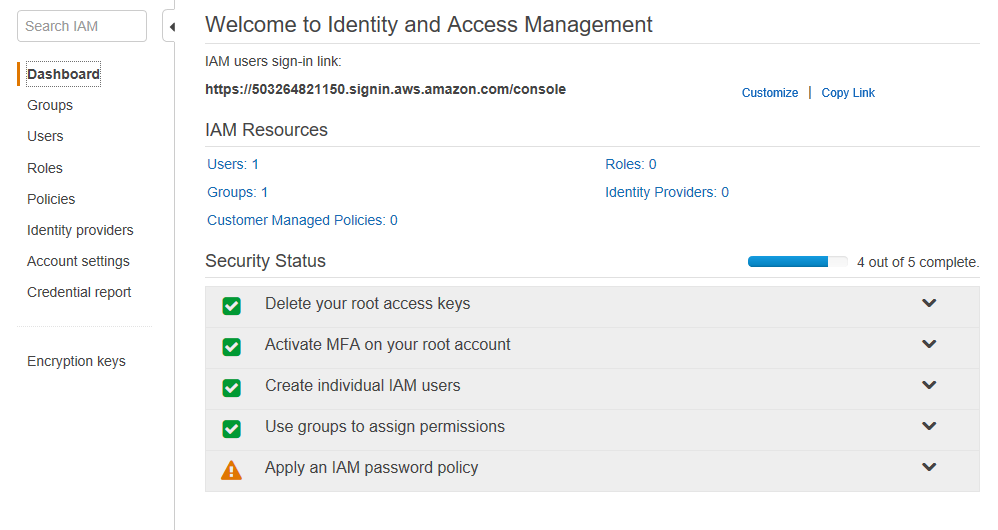
You’ll see that you’re further along than you were in your quest to secure your AWS account. You created individual IAM users and also used groups to assign permissions. Awesome. Only one step left.
Apply an IAM Password Policy

Awesome, so now we will define how our users can create passwords for the site.
Click on “Manage Password Policy”.
You’ll see a screen divided into two areas. First the top half, Password Policy.
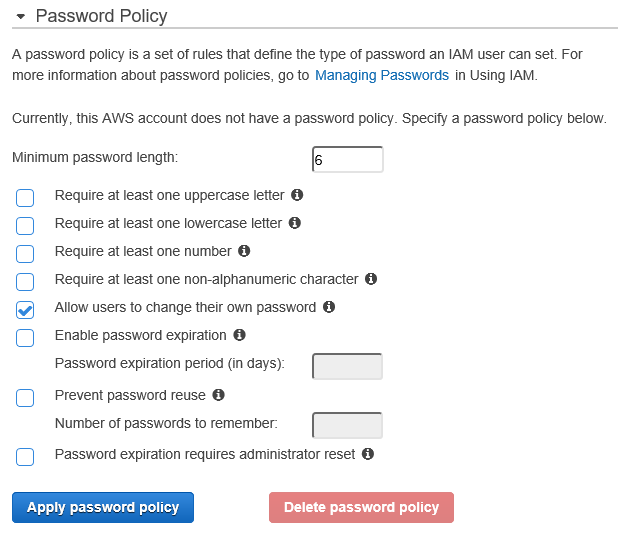
Aha, now you know how pesky humans create confounding password rules for our lives, requiring us to keep Post-Its near our computers with the most current password because we were uninspired on “Password Reset Day”.
Now the bottom half of the screen, Security Token Service Regions.
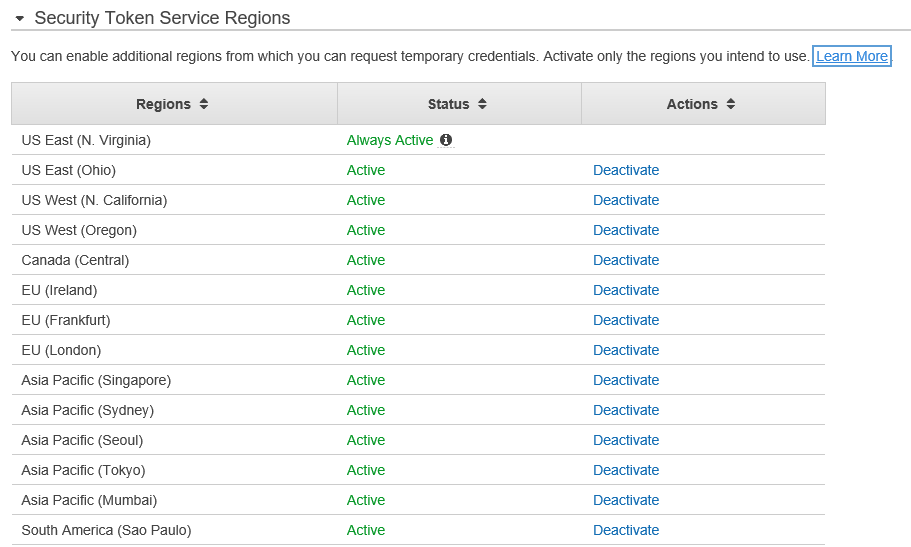
No need to touch this section right now, but a few things to note.
First off, this applies to temporary credentials. Also, by default all regions allow this, but you can deactivate all (except US East – N. Virginia). I’ve not had a chance to play with this, so we’ll tackle it in a future blog post.
All done!
So, back at your dashboard, you’ll see that you’ve completed all the steps to secure the AWS account.
Does this mean your account is totally secure and safe? Heck no, security is an ongoing job. But it’s a lot more secure than it was when you started.
Also, a final note, if you notice the link towards the top of the page that IAM users use to sign-in to the application, it looks a bit generic. If you want to customize it, you can, assuming your custom name isn’t taken. Click on customize and change the link to something you’ll remember.

If you’re curious where that other number came from, it’s your Amazon Account ID, which you can find by going to the My Account link under the dropdown with your user name, at the top right menu.
So go forth, Zombies, and be secure in a world full of insecurity. Your AWS account is ready for use!

