So, everyone is talking about Lambas. And zombies are no exception!
We’re going to take a look at Lambas in AWS and talk about why they’re a big deal. Then we’re going to write one!
Lambdas are a way of running code in the cloud without having to provision a box to run it on. You just upload your code, configure it a little bit, and it will run. It automatically scales for your needs without you having to spin up new boxes, or worry that your current machine can’t handle it. You don’t have to patch your servers or do any of that silly admin stuff people used to worry about in the past (or present). And yes, you can run Lambas in C#
Lambdas are supported in a few languages: Node.js, Python, Go, Java, and C#. Python and Node.js allow you to directly edit the code inline in the AWS web console. For Go, Java and C#, you can’t edit it inline – you need to upload your code (as either a .zip or from S3) to run it (note you can also upload code for Node.js and Python too if you choose).
For today’s lab, we will actually create a lambda inline, which means we need to use either Node.js or Python. We will choose node.js. In a future post, I will show you how to develop Lambdas in C#, I promise. I just want to walk you through creating a lambda in the AWS web console first so you’re familiar with all the concepts.
I know what you’re thinking What? Node.js? Python? These aren’t Microsoft! You are making me learn something new!
Node is just Javascript, and It’s not that bad really. As modern day technologists, we can’t always stick to one language. And we shouldn’t. Learning new languages, like Node.js or French, helps us become more well rounded people who appreciate our other cultures and our own better.

Ok, fine. If you want to read a little bit about Node.js go here: Getting Started With Node.js.
How Lambdas Work
A Lambda is actually a “lambda function”, and should be thought of in those terms. It’s an isolated piece of work that runs in the cloud on a fleet of machines that AWS have configured. You can find out what sorts of machines Amazon uses to run your lambda function here, and by doing so you can discover how to resolve any dependencies your code may have against that environment. We don’t have any to worry about for this project.
Lambdas need triggers to run. What kind of things can trigger a lambda? Here’s a list, but for our interest, here are some of the more interesting triggers: S3, DynamoDB, API Gateway, and SNS.
How are you charged for lambda functions? You are charged each time it is invoked. You are also charged based on how much memory your function uses. Finally, you are charged for how long your function runs. For our purposes, our free tier testing should be more than sufficient to handle running demo lambda functions, as the first million calls are free and the first 400k GB-seconds are free.
You’ll want to do some math on any application at scale though, as when you’re running millions of transactions a day, this can add up. Check here for more details of lambda pricing.
Our Test Project Requirements
What our application will do is, whenever a new file is uploaded to an S3 bucket we specify, our lambda function will detect it. If it is a “.txt” file, it will check to see if the file contents contain the phrase “zombie”. If it does, we will write that file information to an SQS queue for further processing (in a different post).
To summarize our requirements in a short list:
- Detect a file has been added to our S3 bucket.
- If the file name is a “.txt” file, scan the text of the file for the word “zombie”.
- If it finds the word zombie, send the S3 file information to an SQS queue.
Getting Started
Let’s create five text files.
First File: 1.txt
asdfghjklqwertyuiopzxcvbnm
Second file: 2.txt
Zombiezombiezombiezombieoh-no-its-zombies!
Third file: 3.bat
cls
echo Hi there
Fourth file: 4.txt
zombi e zomb ie zom bie zo mbie z ombie
Fifth file: 5.txt
Often misunderstood, zombies are just like you and me.
Did you do all that? No? Okay, fine, you can download the ones I created here: test-files.zip.
Setting Up S3 – Our Trigger
If you haven’t worked with S3, it’s essentially a place where you can store files, and can be thought of as a “file share in the cloud”. That’s a bit of an oversimplification, as it is essentially a key/value pair system, but for right now that gets the idea across. Instead of having “folders” it has “buckets”. And like folders can have subfolders, buckets have similar partitioning called “prefixes”. And inside of these you have your files.
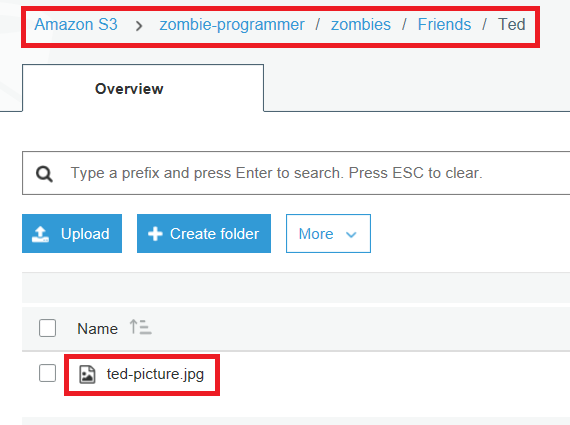
So an example S3 path to a given file named “ted-picture.jpg” might be:
zombie-programmer/zombies/Friends/Ted/ted-picture.jpg

Note: This is Ted, a robot zombie in the series Buffy the Vampire Slayer.
The file is ted-picture.jpg, and it is in the bucket named “zombie-programmer”, under the prefix “zombies/Friends/Ted”. Looking at it from inside the AWS web console, you’ll see the following
You’ll notice I mixed up the letter case there a little bit. That’s because there are a few rules on bucket names (in my case, zombie-programmer). Bucket names need to be all lowercase, though you can mix in some special characters like dashes. This doesn’t apply to prefixes though, as you can see I can use upper case and lower case for prefix names. Bucket names also need to be unique to Amazon among all the accounts in the world. So if you try to create a bucket called “test”, chances are someone else has a bucket with that same name.
Setting Up Our S3 Bucket
So login to your AWS web console at console.aws.amazon.com, enter your login/password, and enter your MFA key (you did set up MFA, right?), then navigate to S3, which is under Storage.

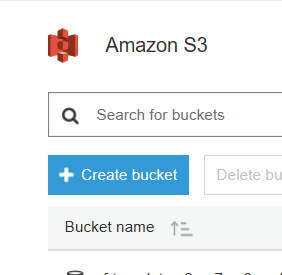
Then click the big blue Create Bucket button
Then choose a unique name for your bucket. I am using “zombie-lambda1-test”. You can’t use my name, so make one up that you’ll remember. Then click on the button at the bottom left to create, since we don’t need to change any other settings on our bucket.
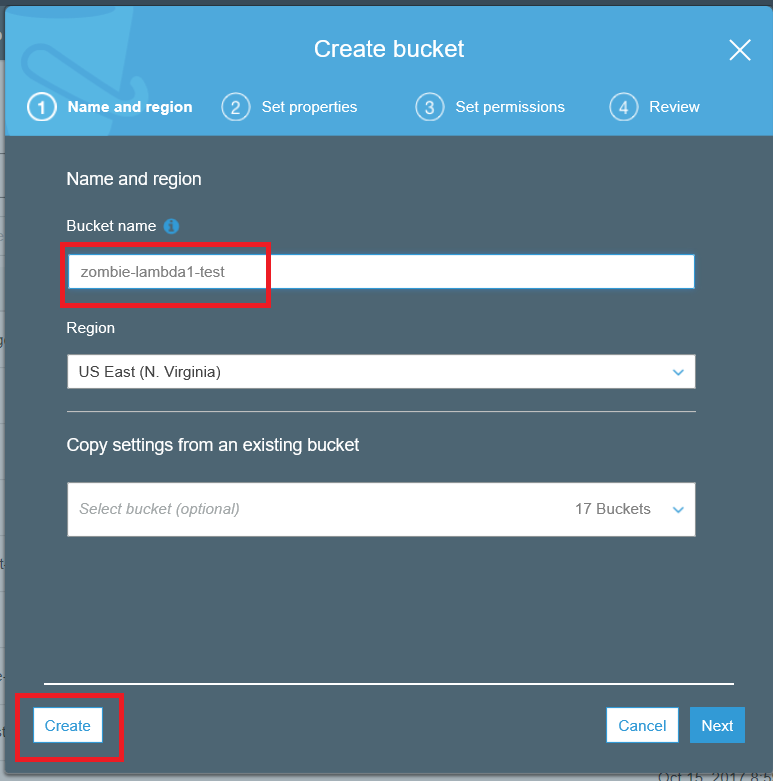
We don’t need a sub-folder (I mean “prefix”), so that’s good enough for our S3 setup.
Setting Up SQS – Our Destination
Let’s now create an SQS queue for us to store the list of files from S3 that contain zombie in the text.
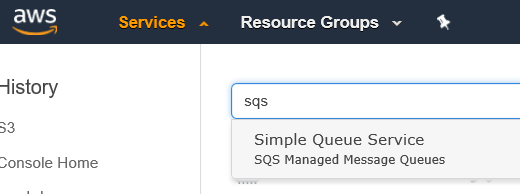
Note, with Amazon having over 100 services, sometimes it’s easier to just search for it in the textbox AWS gives us, rather than scroll far right and down to try to find a service.
Once in SQS, let’s select “Create New Queue”.
I’m calling mine “Zombie-List-From-Lambda”. You can use my name, or one of your own (you rebel). A standard queue is just fine for our needs.
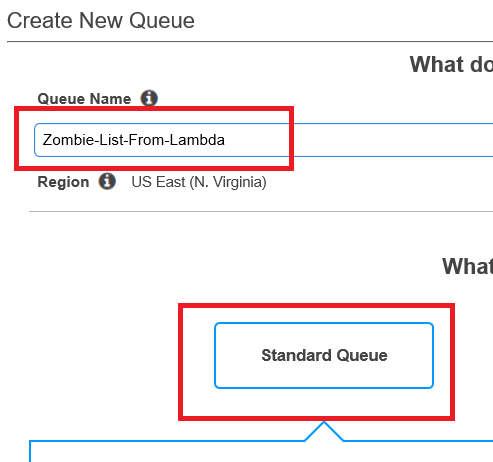
Scroll to the bottom and click “Quick-Create Queue”.
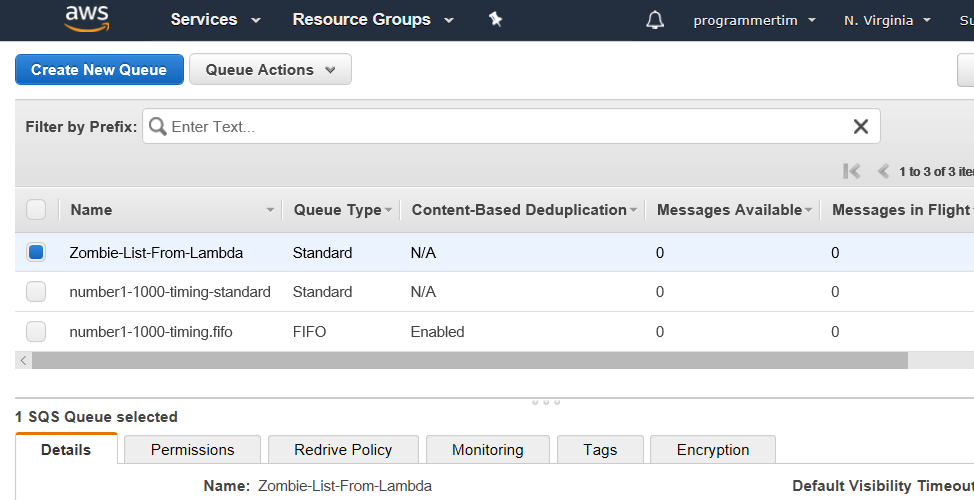
So now we have a shiny new empty queue that can serve as our destination. So now let’s create our lambda!
Creating Our Lambda – Our Logic
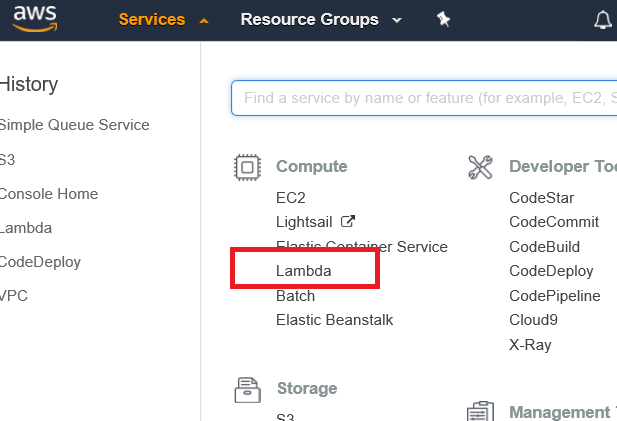
Ok, so back to the list of services, and select Lambda, which is under Compute.
If you’ve never been here before, you’ll see the following screen.
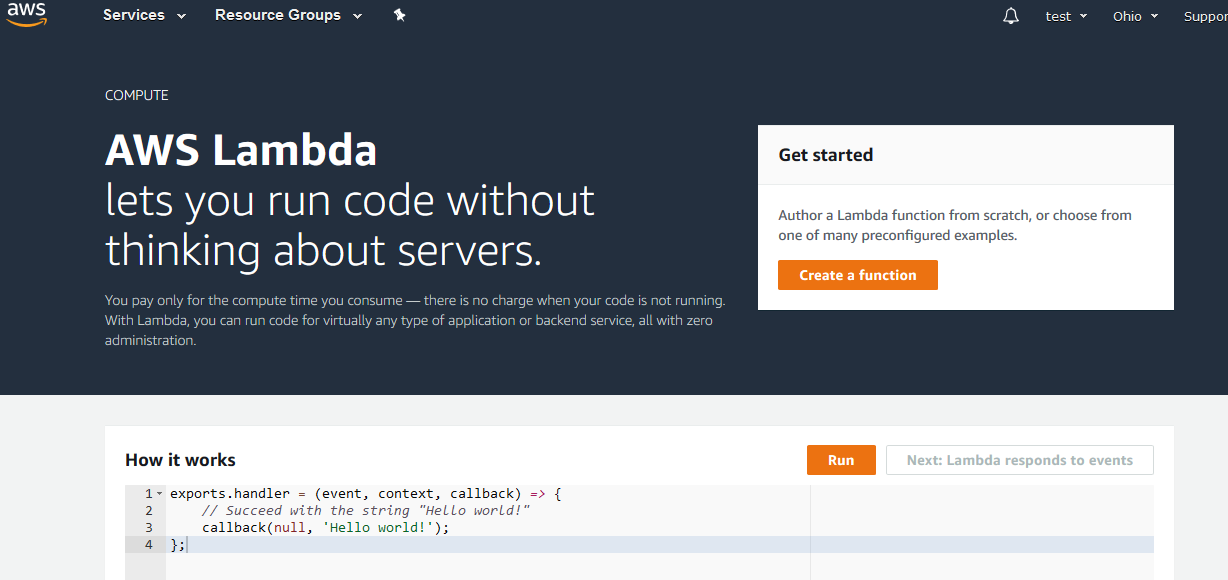
Click the big orange “Create a function” button.
Creating a Function
You’ll now see the following:
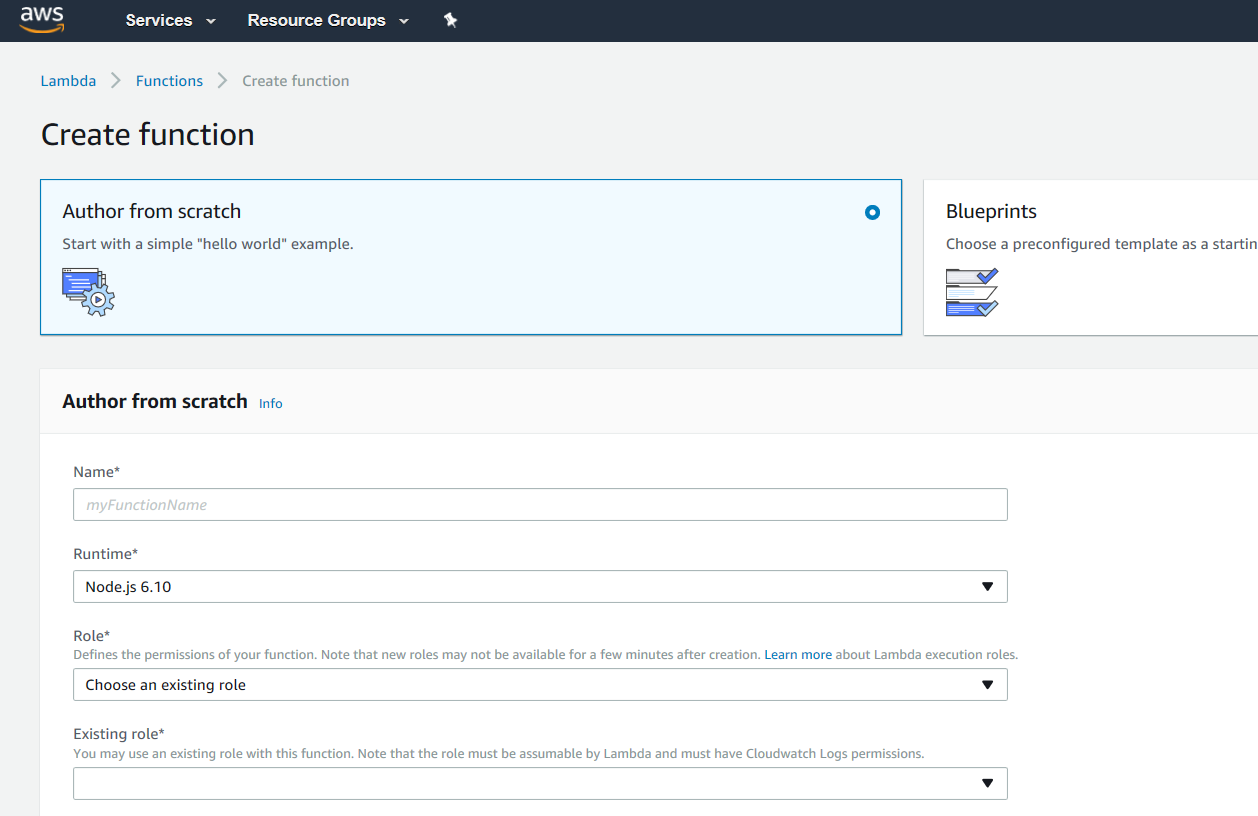
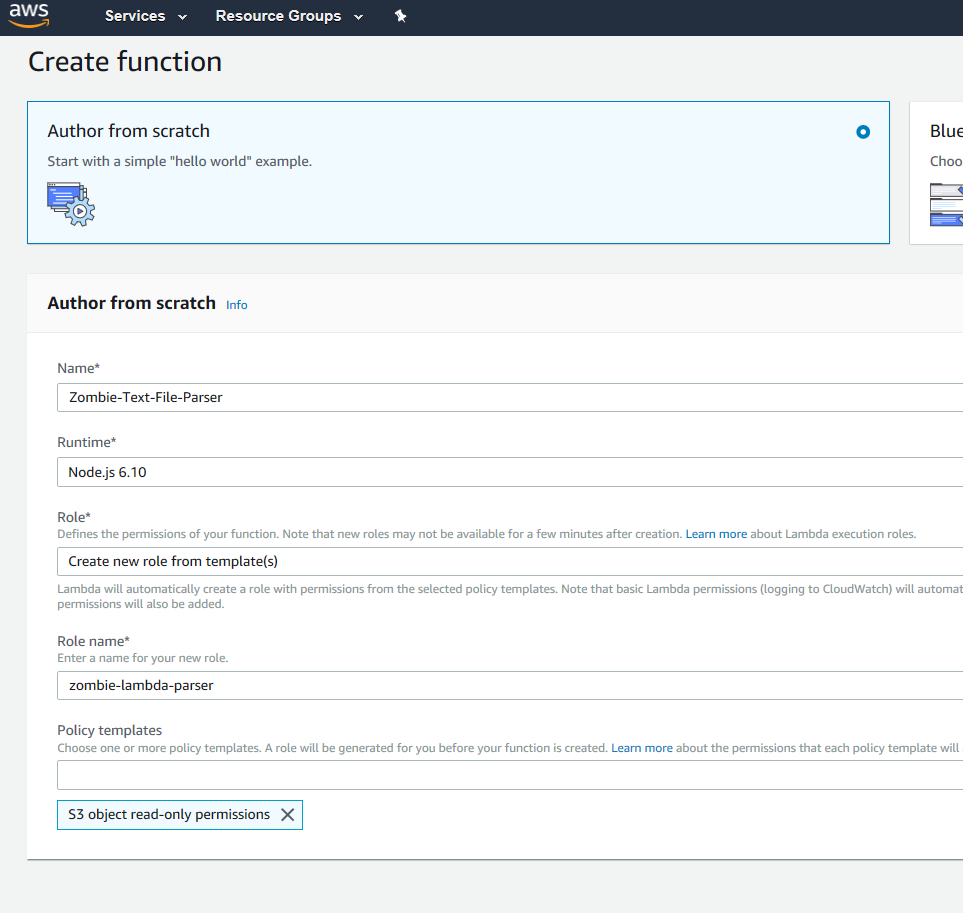
It’s not that scary. We’re going to want to choose “Author from scratch”. Notice it’s background is a light blue when selected.

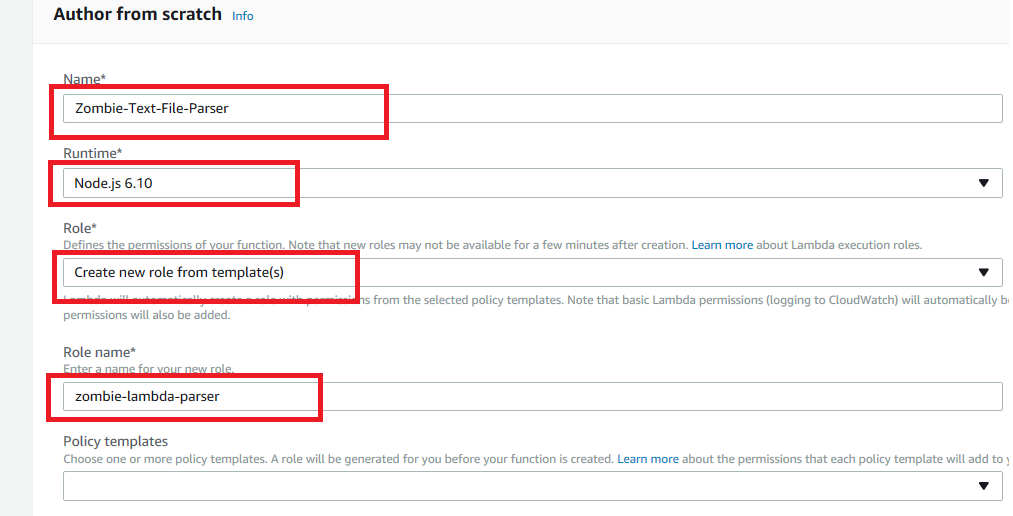
Then give your function a name. I’m calling mine “Zombie-Text-File-Parser”. Let’s choose “Node.js 6.10” for the runtime.
Now we’re at the Role selection. This will define what our Lambda has permission to access. Let’s “create new role from template(s)”, and give our role a new name. I’ll call mine “zombie-lambda-parser”.
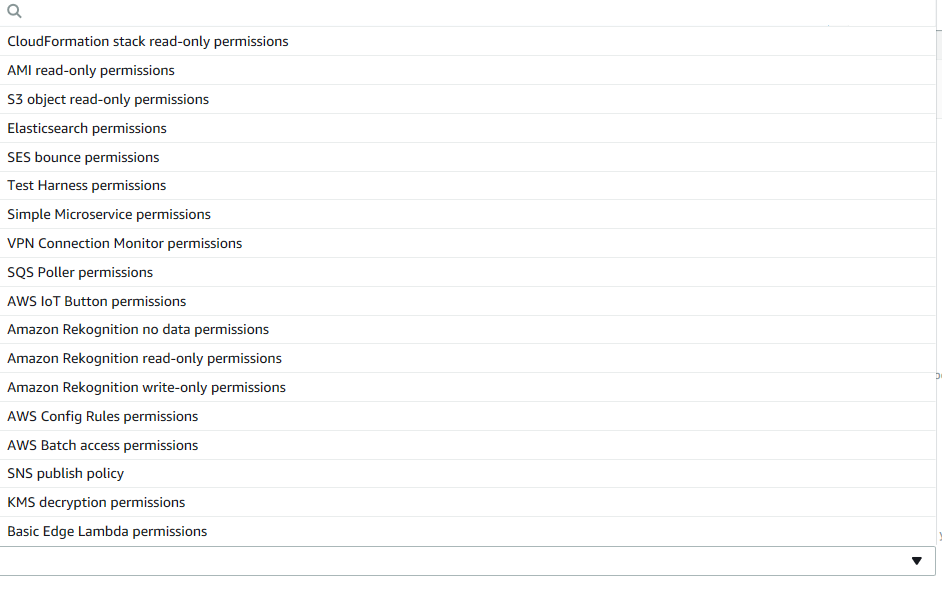
Now select the Policy Template dropdown. You can see there are a lot of choices here. For us, let’s choose “S3 object read-only permissions”
When done, your screen should look like this:
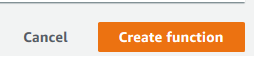
Click on the big orange “Create function” choice on the bottom right of the screen.
Note, once you click, it may take a few seconds to configure everything.
Editing the Function – Triggers
Once done, you should see a new screen with a box at the top saying that your Lambda function has been successfully created.
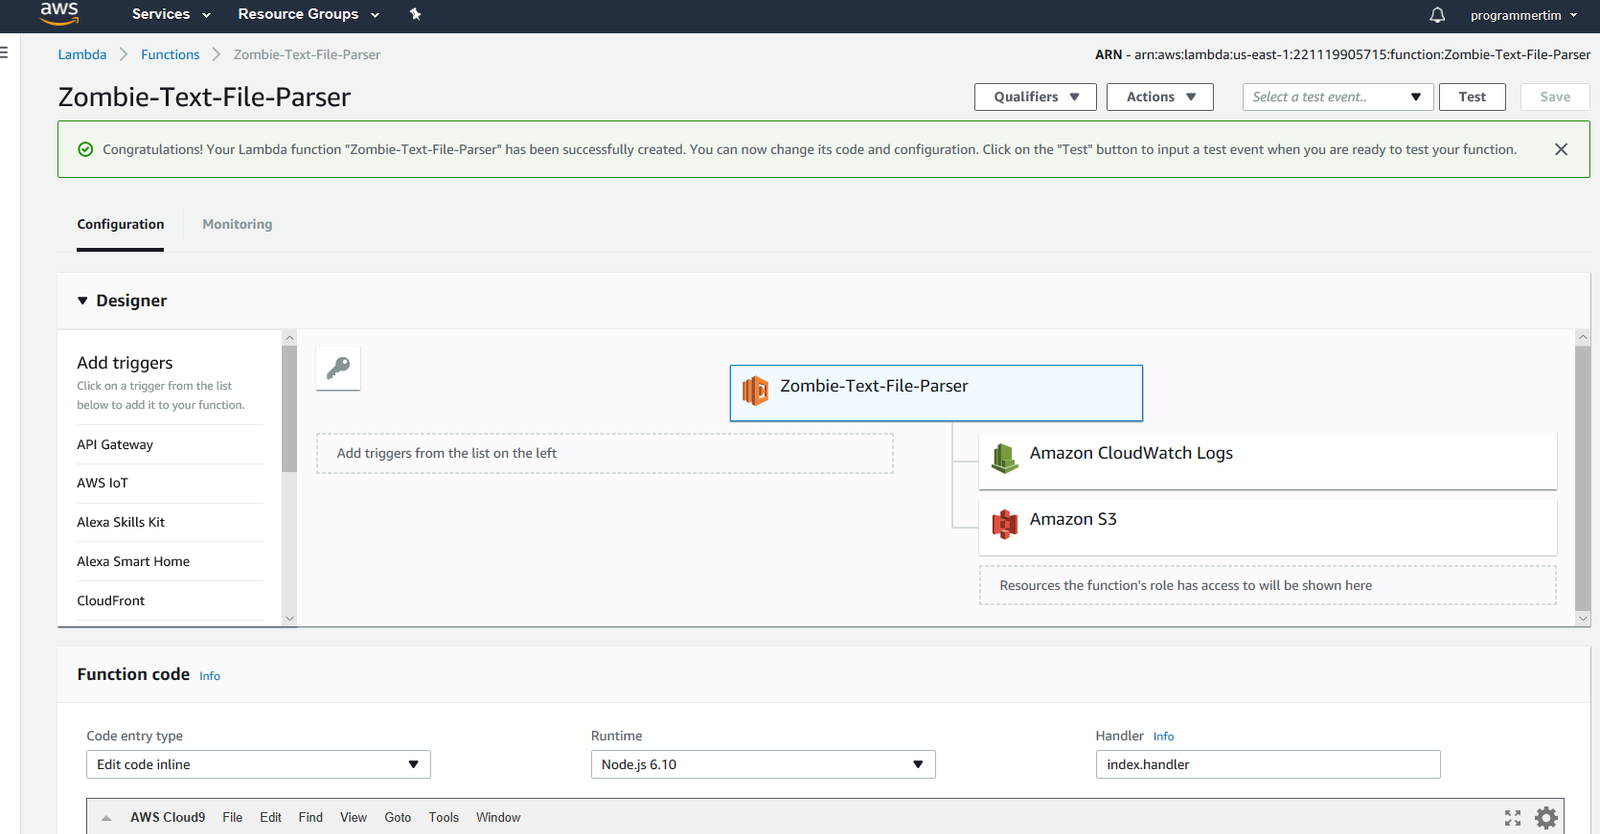
Ok, so this screen is big, and there are a lot of options. Let me walk you through what we want to do.
First, we want to define our trigger.
From the “Designer” box, scroll down the left hand side until you find S3. Click on S3 and it will be added as a trigger.
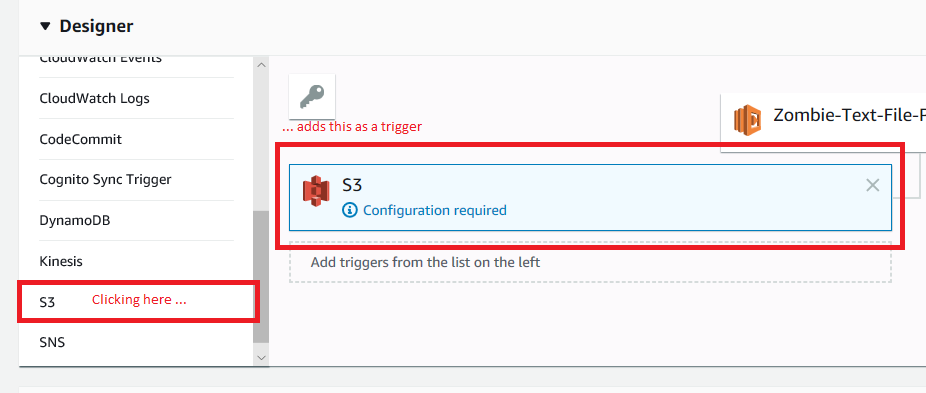
Ok, great, so we got the trigger set up. It does need to be configured though. Click on the “Configuration required” text. You’ll notice your S3 box has a light blue background. Now scroll down.
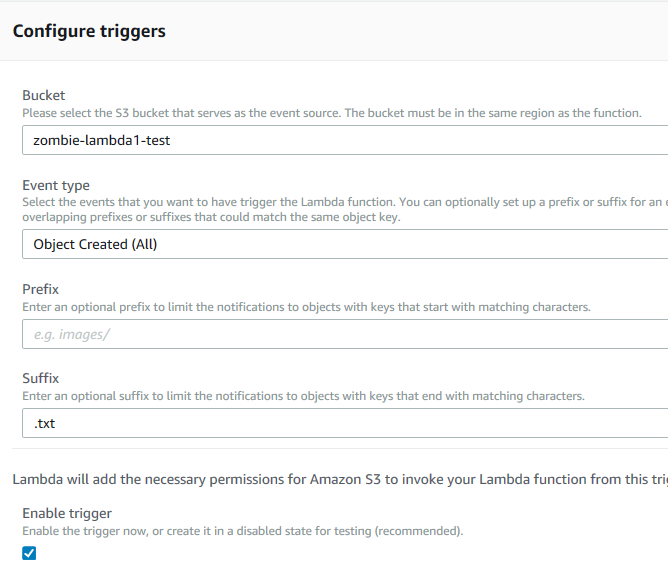
We want to configure the following:
- Bucket: choose the one that you created
- Event type: “Choose Object Created (All)”
- Prefix: leave blank
- Suffix: type “.txt” here
- Leave the Enable trigger checkbox checked, since no files are going into the bucket while we’re configuring our lambda.
On the far right, there will be an “Add” button. Go ahead and click that.
Your trigger is now configured.
Writing The Code
So now let’s add some code. First, make sure you’re working with the right thing. Right now you still see all the trigger setup information. Go to the top of the page and click on the “Zombie-Text-File-Parser” box, which is the box for your lambda itself.

It should have a light blue background to indicate it is active.
Now down below, you should see a web-based code editor.
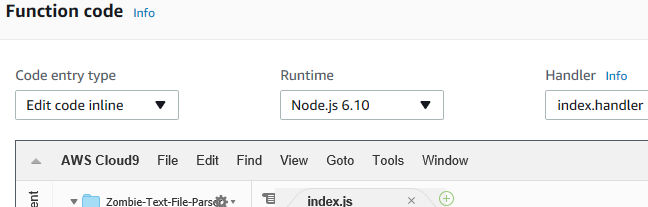
It should be set for “Edit code inline”, “Node.js 6.10” (or later if there’s an update after this post), and Handler should be set to “index.handler”, which indicates what function the lambda will call when triggered. It’s the lambda equivalent of the Main function in a c# console application (more or less).
You should also see the index.js tab and be able to edit in it. However, I’ve noticed sometimes the in-line editor is quirky, and I get a spinny-wait-thing in the tab where the “x” is. If that happens, close the file using the “x” (the “x” won’t be there, but you can still click there to close), then go to the left side panel of the editor and double-click index.js. It should now be editable.
Add the following code.
|
1 2 3 4 5 6 7 8 9 10 11 12 13 14 15 16 17 18 19 20 21 22 23 24 25 26 27 28 29 30 31 32 33 34 35 36 37 38 39 40 41 42 43 44 45 46 47 48 49 50 51 52 53 54 55 56 57 58 59 60 |
var QUEUE_URL = 'https://sqs.us-east-1.amazonaws.com/221119905715/Zombie-List-From-Lambda'; var AWS = require('aws-sdk'); var sqs = new AWS.SQS({ region: 'us-east-1' }); var s3 = new AWS.S3(); exports.handler = (event, context, callback) => { var bucketName = event.Records[0].s3.bucket.name; var fileName = event.Records[0].s3.object.key; console.log('Bucket: ' + bucketName); console.log('File: ' + fileName); var fileUrl = 'http://s3.amazonaws.com/' + bucketName + '/' + fileName; // Retrieve the object s3.getObject({ Bucket: bucketName, Key: fileName }, function(err, data) { if (err) { console.log(err, err.stack); callback(err); } else { var fileContents = data.Body.toString('ascii'); var stringToFind = 'zombie'; if (fileContents.indexOf(stringToFind) > -1) { console.log('found'); var message = JSON.stringify({ file: fileName, bucket: bucketName, url: fileUrl }); var params = { MessageBody: JSON.stringify(message), QueueUrl: QUEUE_URL }; sqs.sendMessage(params, function(err, data) { if (err) { console.log('error:', "Fail Send Message" + err); context.done('error', "ERROR Put SQS"); // ERROR with message } else { console.log('data:', data.MessageId); context.done(null, ''); // SUCCESS } }); } else { console.log('not found'); } console.log("Raw text:\n" + data.Body.toString('ascii')); callback(null, null); } }); callback(null, fileName + ' processed.'); }; |
Essentially, this code starts at the “exports.handler” line, and receives an S3 event as part of its call. It then:
- Pulls the bucket name and key (which is S3 for file name) out of the event.
- Goes to the S3 service and tries to get the object.
- If it finds it, it reads the message and looks for the word ‘zombie’ using the indexOf method.
- If it finds the text, it will create a message body.
- Finally, it sends the message to SQS.
There are some lines that deal with error processing and some console.logs to write out information at various stages of processing. But trust me, it will work!
You don’t trust me? Fine, ok, let’s do a test!
Testing
If you scroll to the top of the page and then look to your right, you’ll see a couple buttons.

Anytime the button “Save” is orange, it means there has been a change. Make sure to click it to save before beginning any test. Once clicked, it goes back to a a faded state with a white background.
Click on the “Test’ button.
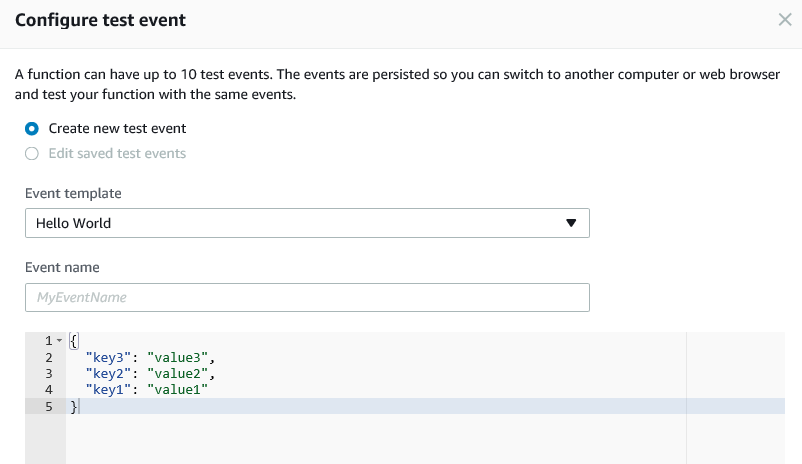
So, our lambda expects an S3 put operation to trigger it. So we need to use that for our test.
In the Event template box, click the dropdown and choose “S3 Put”
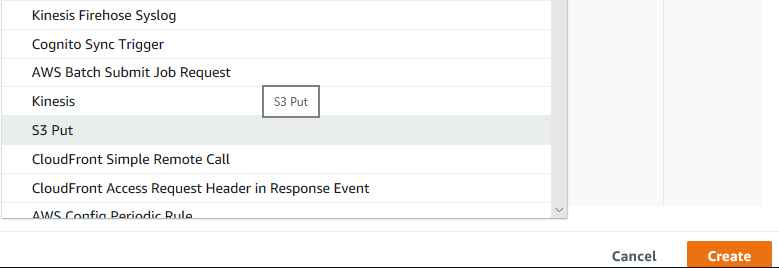
Click on the S3 put line. Your screen will change to show a whole lot of Json for the test. This is what the S3 event looks like.
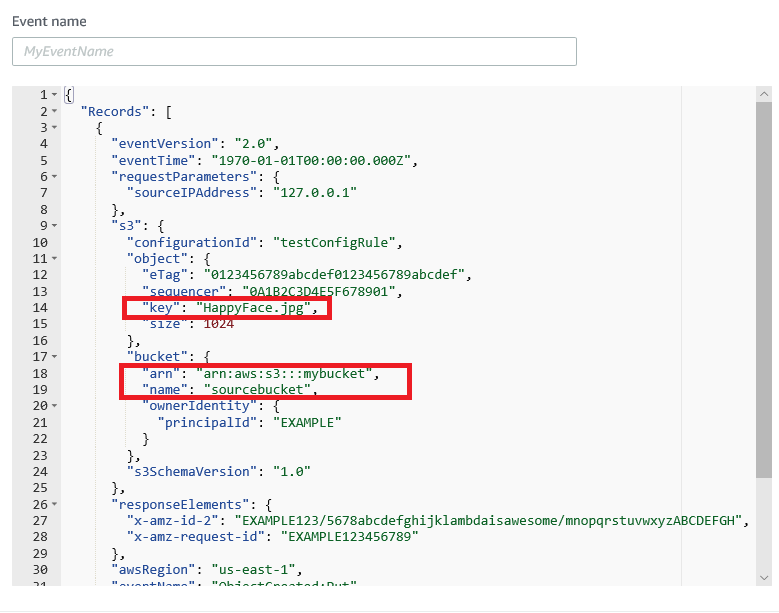
You’ll want to change a couple of the lines, which I’ve marked in red.
First, change the key line to “5.txt”. We don’t like Happyface.jpg.
Second, change the arn reference with “mybucket” to reference the name of your bucket. In my case, it’s called “zombie-lambda1-test”. Make that change also for the “name” line underneath, where the default template shows “sourcebucket”.
Give your test a name. I’ll call mine “test1”.
It should now look like the following:
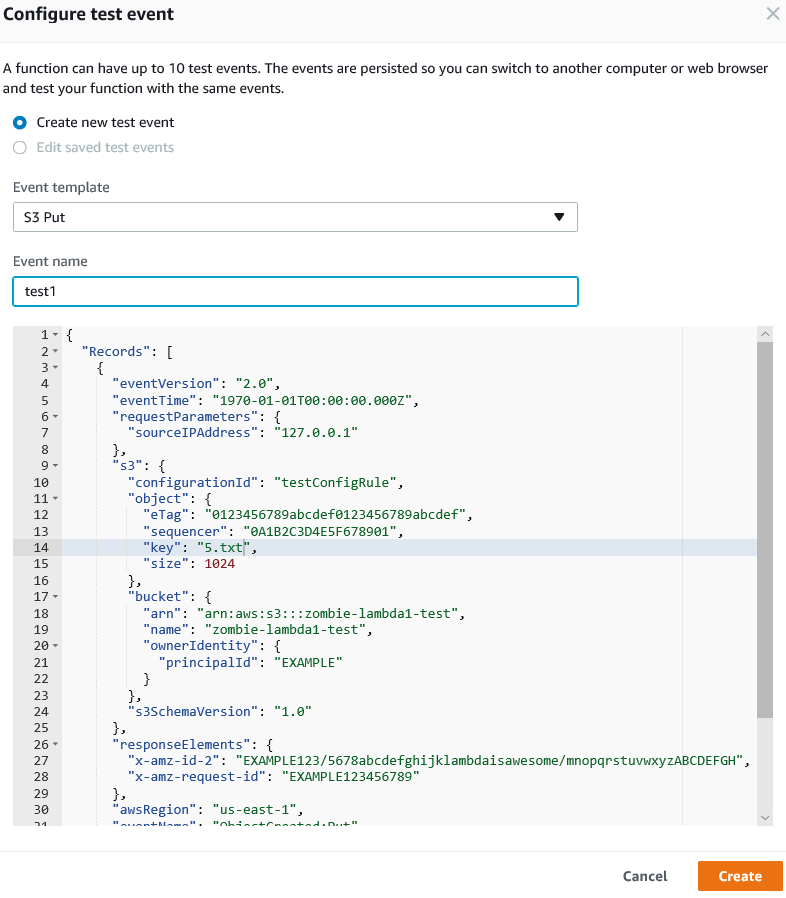
Now click the orange button for “Create”.
The top of your screen should now look like this:

Click on the Test button, and let’s see what happens!
Errors And Fixing Things
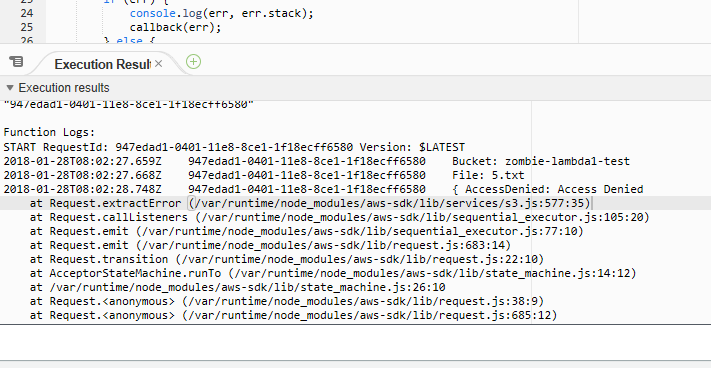
Crap, I got some errors. It looks like an access denied message coming from s3.
Fixing Access Denied Error
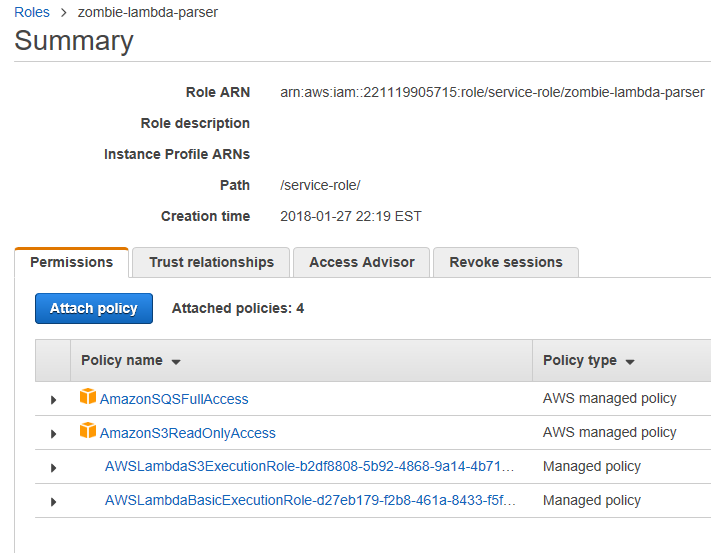
I am going to guess that my role I am using to run my lambda doesn’t have access to S3. That role was called “zombie-lambda-parser”. Let’s go over to IAM to check what permissions that role has.
Navigate to IAM (making sure you’ve saved any work first if the Save button is orange). Once in IAM, click “Roles” on the right, and then click on your role.
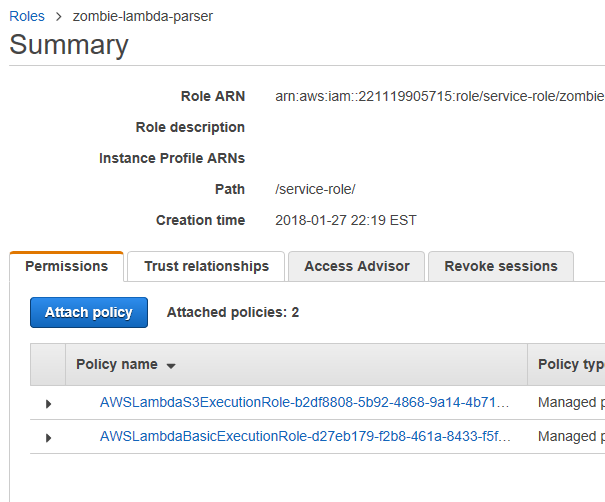
Let’s go ahead and attach a policy to read S3Y. Click on “Attach policy”.
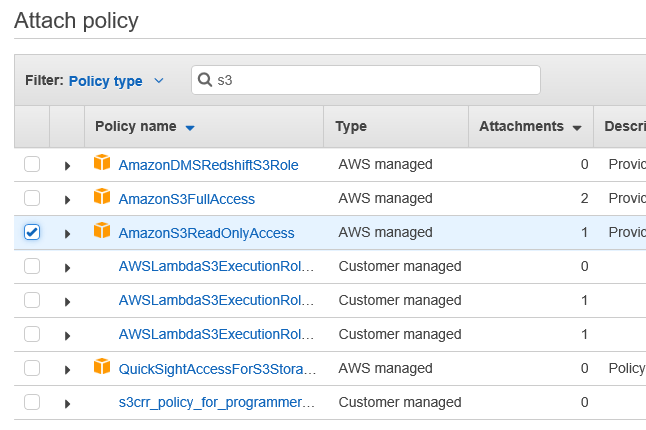
Do a filter by S3 and choose AmazonS3ReadOnlyAccess, as that’s all we need.
While we’re here, we will probably encounter the same issue with writing to SQS. So let’s add a policy to let us do that.
Filter by sqs, and add “AmazonSQSFullAccess”. Even though it’s not displayed on the screen, it will keep track of your previous checkbox.
When you’ve checked both, click on “Attach Policy” down in the bottom right.
You’ll be dumped back to the Role list screen. Click your policy link again and it should look like this:
Ok, now go back to your lambda, and click the “Test” button again.
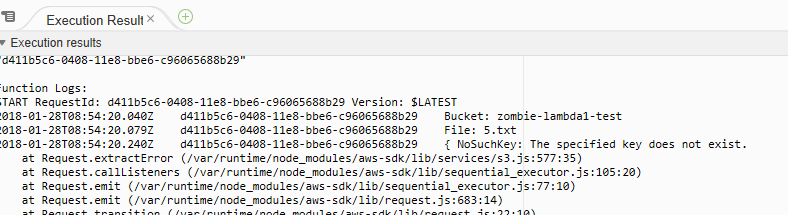
Progress, but I still got an error. This one tells me that NoSuchKey exists. That means it can’t find the file.
Fixing NoSuchKey Error
Even though Lambda is testing your function with a test event, our S3.getObject line of code is trying to find a real object. To fix that, let’s add our file “5.txt” to our S3 bucket.
Navigate to S3, then to your bucket. My bucket name is “zombie-lambda1-test”, but yours will be different.
Click on the bucket and click “Upload”, then upload your file “5.txt”. Make sure to click the “Upload” button in the bottom left.
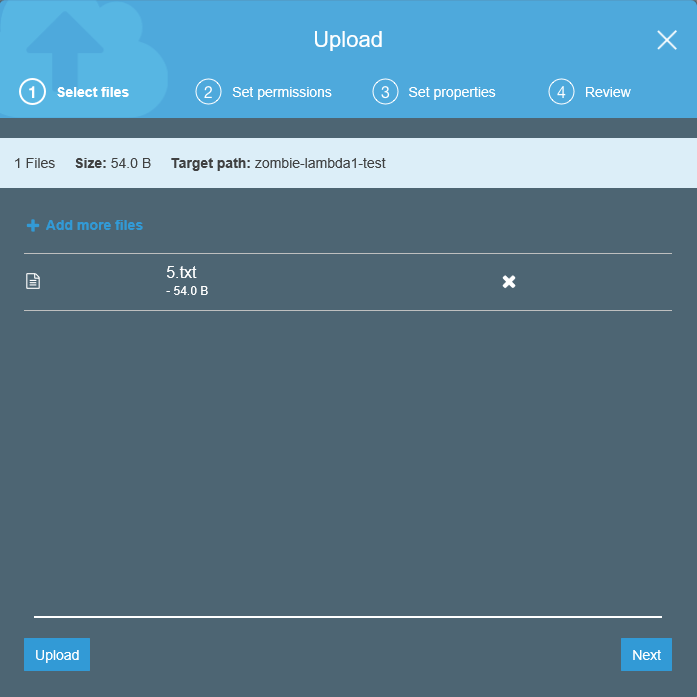
Ok, now return to your lambda function and run your test again.
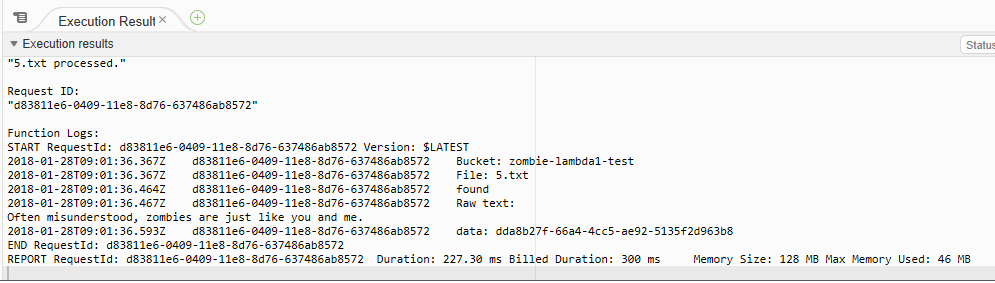
Eureka! No errors! Let’s see if we have a message in our queue.
Verify Output
Go to SQS, and hit the refresh button.
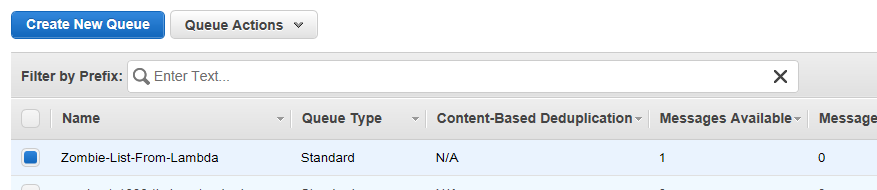
Awesome, one message is waiting for … something.
Let’s right click on the queue and choose View/Delete message to see it.
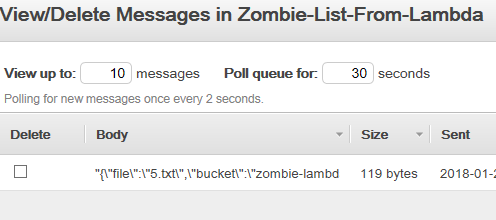
Nice, a JSON chunk of data just waiting to be processed. Awesome!
So let’s do a live test!
Live Test
Let’s dump files 1.txt, 2.txt, 3.bat, and 4.txt in our bucket and see what happens.
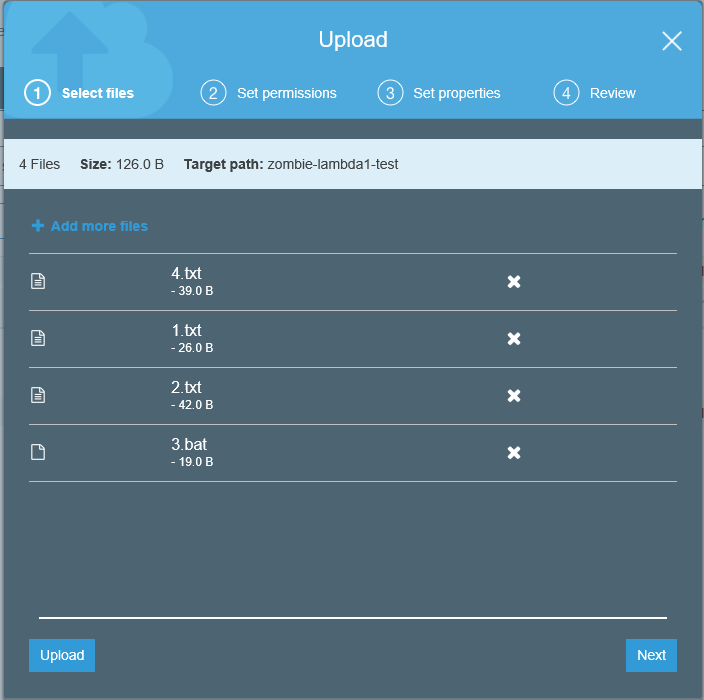
We should expect to see one more message added to our queue (for file 2.txt). Go ahead and click upload, then switch back to our queue.

Yes! Now look at the messages in the queue.
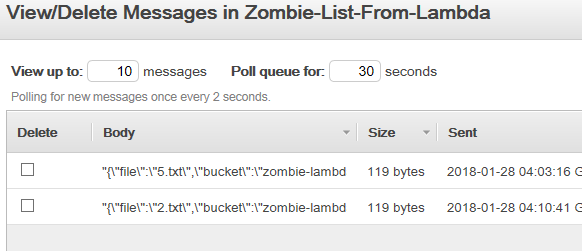
It worked! Congratulations, you just built a zombie file parser!
Conclusions

This was a lot of work, switching around to various parts of AWS, to get everything to work. While the results are neat, next time we’ll look at how to do this all from within Visual Studio.
Keep in mind, Lambdas scale automatically. If we dumped 2000 files into the S3 bucket, Lambda will keep up and process all of them, without us having to worry about what our machine may be suffering. This is the point of serverless programming, we can just focus on the code, like good zombies, and not sweat the infrastructure details.
You’ve taken your first shuffling step towards something exciting. Now go have a coffee (or a beer).